# Welcome to Computle Docs

For support, please contact your account manager.

<table data-card-size="large" data-view="cards"><thead><tr><th></th><th></th><th></th><th data-hidden data-card-cover data-type="files"></th><th data-hidden data-card-target data-type="content-ref"></th></tr></thead><tbody><tr><td><strong>Onboarding</strong></td><td>As an end user, head here.</td><td></td><td><a href="/files/o9k3S89NisHv3qDzKQHF">/files/o9k3S89NisHv3qDzKQHF</a></td><td><a href="https://docs.computle.com/computle-client/computle-client-overview">https://docs.computle.com/computle-client/computle-client-overview</a></td></tr><tr><td><strong>Migrating to Computle</strong></td><td>For migration guidance, head here.</td><td></td><td><a href="/files/fXxFXUggcPNY2GwZr2B7">/files/fXxFXUggcPNY2GwZr2B7</a></td><td><a href="/pages/M9KpSDcEEcc2jV9hdSEF">/pages/M9KpSDcEEcc2jV9hdSEF</a></td></tr><tr><td><strong>Troubleshooting</strong></td><td>For troubleshooting, head here.</td><td></td><td><a href="/files/LhVkaycxFnqxZxvyroPF">/files/LhVkaycxFnqxZxvyroPF</a></td><td><a href="/pages/QLl9sYajWCGYZ4yuOAIT">/pages/QLl9sYajWCGYZ4yuOAIT</a></td></tr><tr><td><strong>GPU Usage Analyser</strong></td><td>For our free GPU usage analyser, head here.</td><td></td><td><a href="/files/makFfjoyGmBcTvQfPcI4">/files/makFfjoyGmBcTvQfPcI4</a></td><td><a href="/pages/BLXFYBZD5o4iEdFsPlUv">/pages/BLXFYBZD5o4iEdFsPlUv</a></td></tr><tr><td><strong>Service Delivery</strong></td><td>For service information, head here.</td><td></td><td><a href="/files/oQIC0exdRNxRoaWoCnDh">/files/oQIC0exdRNxRoaWoCnDh</a></td><td><a href="/pages/7IFLwxPZIiVFMnrZQTEy">/pages/7IFLwxPZIiVFMnrZQTEy</a></td></tr><tr><td><strong>Corporate Governance</strong></td><td>For corporate governance, head here.</td><td></td><td><a href="/files/6k0g4BBPipzvjdQi34Hw">/files/6k0g4BBPipzvjdQi34Hw</a></td><td><a href="/pages/Kw0eFQMxKQdEjFuZDPS2">/pages/Kw0eFQMxKQdEjFuZDPS2</a></td></tr><tr><td>Computle Client v3</td><td>For information on our new client, head here.</td><td></td><td><a href="/files/XFbbzwLLG1RjgZ3Fnu7s">/files/XFbbzwLLG1RjgZ3Fnu7s</a></td><td><a href="/pages/xzGcijJrIv33cvulp7d5">/pages/xzGcijJrIv33cvulp7d5</a></td></tr></tbody></table>


# Installers

## Co**mputle Client**

<table data-card-size="large" data-column-title-hidden data-view="cards"><thead><tr><th></th><th data-hidden data-card-target data-type="content-ref"></th><th data-hidden data-card-cover data-type="image">Cover image</th></tr></thead><tbody><tr><td></td><td><a href="https://softwaredownloads.oncomputle.com/ComputleClientV3_Setup_3.1.0.2.exe">https://softwaredownloads.oncomputle.com/ComputleClientV3_Setup_3.1.0.2.exe</a></td><td><a href="/files/N8t1PkF1iz4L3bKwjbNY">/files/N8t1PkF1iz4L3bKwjbNY</a></td></tr><tr><td></td><td><a href="https://softwaredownloads.oncomputle.com/ComputleClient-3.1.0-Universal.pkg">https://softwaredownloads.oncomputle.com/ComputleClient-3.1.0-Universal.pkg</a></td><td><a href="/files/tDNHviHSx2YONy10DjyF">/files/tDNHviHSx2YONy10DjyF</a></td></tr></tbody></table>

{% hint style="info" %}
**System requirements:**

* Windows 10/11 or MacOS 14+ ARM.
* 850MB of available storage.
* Internet access.

***

* **For 1080p support:** A 4 core CPU with 5Mbps bandwidth.
* **For dual 1080p support:** A 4 core CPU with UDH graphics with 15Mbps bandwidth.
* **For dual 4k support and dual 5k support:** An eight core GPU with Iris XE graphics with 50Mbps bandwidth.
  {% endhint %}

{% hint style="info" %}
**Documentation:**

View documentation for Computle Client [here](/computle-client/computle-client-overview).
{% endhint %}

{% hint style="warning" %}
**Silent Installation:**

To install silently, run: *.exe /S.* The installation will take around 15 minutes.
{% endhint %}

***

## **Mechdyne TGX**

<table data-card-size="large" data-column-title-hidden data-view="cards"><thead><tr><th></th><th data-hidden data-card-target data-type="content-ref"></th><th data-hidden data-card-cover data-type="files"></th></tr></thead><tbody><tr><td></td><td><a href="https://softwaredownloads.oncomputle.com/TGX_Receiver_2025.1.0.11413_64-bit.exe">https://softwaredownloads.oncomputle.com/TGX_Receiver_2025.1.0.11413_64-bit.exe</a></td><td><a href="/files/N8t1PkF1iz4L3bKwjbNY">/files/N8t1PkF1iz4L3bKwjbNY</a></td></tr><tr><td></td><td><a href="https://softwaredownloads.oncomputle.com/TGX-Receiver-2025.1.0.11413.dmg">https://softwaredownloads.oncomputle.com/TGX-Receiver-2025.1.0.11413.dmg</a></td><td><a href="/files/tDNHviHSx2YONy10DjyF">/files/tDNHviHSx2YONy10DjyF</a></td></tr></tbody></table>

{% hint style="info" %}
Mechdyne TGX is available as a paid add-on to Computle plans. Regular users should use NICE DCV.
{% endhint %}

***

## **NICE DCV**

<table data-card-size="large" data-column-title-hidden data-view="cards"><thead><tr><th></th><th data-hidden data-card-target data-type="content-ref"></th><th data-hidden data-card-cover data-type="image">Cover image</th></tr></thead><tbody><tr><td></td><td><a href="https://d1uj6qtbmh3dt5.cloudfront.net/2025.0/Clients/nice-dcv-client-Release-2025.0-9800.msi">https://d1uj6qtbmh3dt5.cloudfront.net/2025.0/Clients/nice-dcv-client-Release-2025.0-9800.msi</a></td><td><a href="/files/N8t1PkF1iz4L3bKwjbNY">/files/N8t1PkF1iz4L3bKwjbNY</a></td></tr><tr><td>Mac ARM Silicon</td><td><a href="https://d1uj6qtbmh3dt5.cloudfront.net/2025.0/Clients/nice-dcv-viewer-2025.0.8846.x86_64.dmg">https://d1uj6qtbmh3dt5.cloudfront.net/2025.0/Clients/nice-dcv-viewer-2025.0.8846.x86_64.dmg</a></td><td><a href="/files/tDNHviHSx2YONy10DjyF">/files/tDNHviHSx2YONy10DjyF</a></td></tr><tr><td>Mac Intel</td><td><a href="https://d1uj6qtbmh3dt5.cloudfront.net/2025.0/Clients/nice-dcv-viewer-2025.0.8846.arm64.dmg">https://d1uj6qtbmh3dt5.cloudfront.net/2025.0/Clients/nice-dcv-viewer-2025.0.8846.arm64.dmg</a></td><td><a href="/files/tDNHviHSx2YONy10DjyF">/files/tDNHviHSx2YONy10DjyF</a></td></tr></tbody></table>

***

## **WireGuard**

<table data-card-size="large" data-column-title-hidden data-view="cards"><thead><tr><th></th><th data-hidden data-card-target data-type="content-ref"></th><th data-hidden data-card-cover data-type="files"></th></tr></thead><tbody><tr><td></td><td><a href="https://softwaredownloads.oncomputle.com/wireguard-x86-0.5.3.msi">https://softwaredownloads.oncomputle.com/wireguard-x86-0.5.3.msi</a></td><td><a href="/files/N8t1PkF1iz4L3bKwjbNY">/files/N8t1PkF1iz4L3bKwjbNY</a></td></tr><tr><td></td><td><a href="https://apps.apple.com/us/app/wireguard/id1451685025?mt=12">https://apps.apple.com/us/app/wireguard/id1451685025?mt=12</a></td><td><a href="/files/tDNHviHSx2YONy10DjyF">/files/tDNHviHSx2YONy10DjyF</a></td></tr></tbody></table>

***


# Computle Client: Get Started

1. **Download Computle Client and follow the installation steps.**

<table data-card-size="large" data-column-title-hidden data-view="cards"><thead><tr><th></th><th data-hidden data-card-target data-type="content-ref"></th><th data-hidden data-card-cover data-type="image">Cover image</th></tr></thead><tbody><tr><td></td><td><a href="https://softwaredownloads.oncomputle.com/ComputleClientV3_Setup_3.1.0.2.exe">https://softwaredownloads.oncomputle.com/ComputleClientV3_Setup_3.1.0.2.exe</a></td><td><a href="/files/N8t1PkF1iz4L3bKwjbNY">/files/N8t1PkF1iz4L3bKwjbNY</a></td></tr><tr><td></td><td><a href="https://softwaredownloads.oncomputle.com/ComputleClient-3.1.0-Universal.pkg">https://softwaredownloads.oncomputle.com/ComputleClient-3.1.0-Universal.pkg</a></td><td><a href="/files/tDNHviHSx2YONy10DjyF">/files/tDNHviHSx2YONy10DjyF</a></td></tr></tbody></table>

2. **Click Login with Microsoft**

<figure><img src="/files/y6vtW6DBk5WNKqTNAjlv" alt=""><figcaption></figcaption></figure>

3. **Enter your work email.**

<figure><img src="/files/Mc5AIxnc5tOqC61KpwsZ" alt=""><figcaption></figcaption></figure>

4. **Enter your password.**

<figure><img src="/files/g7TAsFTj9JPBHxgyt2W7" alt=""><figcaption></figcaption></figure>

5. **If requested, grant application consent for Computle Client to:**
   1. Sign you in and read your profile.
   2. Maintain access to data you have given it access to.

<figure><img src="/files/HoiJInZ3zaMsZMkCvy8t" alt=""><figcaption></figcaption></figure>

{% hint style="warning" %}
Application consent must be granted for Computle Client to authenticate against Entra ID. To consent on behalf of your organisation, select "Consent on behalf of your organisation".
{% endhint %}

<figure><img src="/files/aYcaBnAQaFP9RagBoGxh" alt=""><figcaption></figcaption></figure>

6. **If requested, enrol in Microsoft Authenticator.**

<figure><img src="/files/y0PqaWxc5FgyRF3LI9RL" alt=""><figcaption></figcaption></figure>

7. **If requested, approve the sign in request on your mobile device.**

<figure><img src="/files/kaHBsfaclOU1CrEggHMh" alt=""><figcaption></figcaption></figure>

8. **Wait for Computle Client to authenticate you.**

<figure><img src="/files/N2nyo4c8ma7KPzREWwYY" alt=""><figcaption></figcaption></figure>

9. **Once authenticated, you will be presented with your available machines.**

<figure><img src="/files/hiUnV7wt1fc5PlmOLfZn" alt=""><figcaption></figcaption></figure>

***

## How to Log Out

To logout, click the Log Out icon.

<figure><img src="/files/IAtSKsj7eSsrMc0rXY0R" alt=""><figcaption></figcaption></figure>

***

## Diagnostics

You can view the Diagnostics by heading to Settings > Diagnostics.

<figure><img src="/files/RYRbCQNQxgUszH2yA55h" alt=""><figcaption></figcaption></figure>

<figure><img src="/files/HGQQwpGSjASkFPZdrSOs" alt=""><figcaption></figcaption></figure>

***

## Notes to Administrators

{% hint style="warning" %}
If you are not enrolled, you will receive an error message.
{% endhint %}

<figure><img src="/files/DfJtgcMkJo2W2QjYunSh" alt=""><figcaption></figcaption></figure>

***

## Migrating to Version 3.0.8

Head here.


# Computle Client: Migration Guide (v3.0.8)

{% hint style="danger" %}
Computle Client v3.0.8 is only supported for machines **hosted in the United Kingdom.** Other locations will be added in 2026.
{% endhint %}

### Overview

This guide outlines the migration process to Computle Client v3.0.8, which introduces automatic Windows login presentation and improved authentication handling. This update eliminates the need for users to enter credentials twice and provides a more seamless connection experience.

### What's Changing?

* **Computle Client v3.0.8** enables automatic presentation of the Windows login screen.
* Users are automatically presented with their Computle machine after sign-in.
* Authentication is handled by the Computle Client instead of DCV web interface.
* Administrators can connect to all Computle machines directly from the portal.
* Web access will be disabled to improve security.

#### Prerequisites Verification

{% hint style="warning" %}
**Critical:** Before changing DCV authentication settings, you **must** disable public web access to prevent security breaches. When authentication is set to "none" to allow Computle Client to handle login, the web interface would load Windows with no password protection if left publicly accessible. This step is performed by Computle at a tenant-router level, but you can optionally perform this step yourself by limiting the DCVServer service in Windows Firewall.
{% endhint %}

The migration script automatically checks that DCV ports are not publicly accessible. If ports are open, the script will fail with:

```
You have not passed pre-requisites, please consult your account rep.
```

This safeguard ensures machines cannot be accessed without authentication via the web interface.

***

### Migration Phases

#### Phase 1: Client Deployment and Testing

**Objective:** Deploy Computle Client v3.0.8 and verify compatibility

**Owner:** Client/MSP/IT

**Steps:**

1. Download Computle Client v3.0.8 installer from [Computle Docs - Installers](https://docs.computle.com/installers/installers).
2. Restart the target machine to close all Computle instances.
3. Deploy to a test machine in your office.
4. Verify installation and basic functionality.
5. Test system access and confirm normal operations.
6. Once confirmed stable, deploy the client update to remaining user machines.

**Installation Command (Silent):**

```powershell
ComputleClientV3_3.0.8_Setup.exe /S
```

*Note: Silent installation takes approximately 15 minutes*

***

#### Phase 2: Authentication Migration (Pilot)

**Objective:** Migrate one test machine to new authentication method

**Steps:**

**2.1 Identify Test User**

IDentify one user for pilot testing.

**2.2 Disable Public Web Access**

**Owner:** Computle\
Ensure the selected Computle machine's DCV ports are not publicly accessible.

**2.3 Run Authentication Migration Script**

**Owner:** Computle/MSP/IT\
Execute the following PowerShell script on the selected Computle machine:

```powershell
$securityRegPath = "Registry::HKEY_USERS\S-1-5-18\Software\GSettings\com\nicesoftware\dcv\security"

$publicIP = (Invoke-RestMethod -Uri "https://api.ipify.org").Trim()

$portsOpen = $false
for ($port = 8443; $port -le 8473; $port++) {
    try {
        $tcpClient = New-Object System.Net.Sockets.TcpClient
        $connect = $tcpClient.BeginConnect($publicIP, $port, $null, $null)
        $wait = $connect.AsyncWaitHandle.WaitOne(1000, $false)
        
        if ($wait -and $tcpClient.Connected) {
            $portsOpen = $true
            $tcpClient.Close()
            break
        }
        $tcpClient.Close()
    }
    catch {
    }
}
if ($portsOpen) {
    "You have not passed pre-requisites, please consult your account rep."
    exit 1
}

if (-not (Test-Path $securityRegPath)) {
    New-Item -Path $securityRegPath -Force | Out-Null
}

New-ItemProperty -Path $securityRegPath -Name "authentication" -Value "none" -PropertyType String -Force | Out-Null

New-ItemProperty -Path $securityRegPath -Name "os-auto-lock" -Value 1 -PropertyType DWORD -Force | Out-Null
Restart-Service -Name "dcvserver" -Force
Clear-Host
"Authentication mode changed to none."
```

**What this script does:**

* Verifies DCV ports are not publicly accessible (safety check).
* Sets DCV authentication to "none" (allows Computle Client to handle auth).
* Enables OS auto-lock for security.
* Restarts DCV server to apply changes.

**2.4 Enable New Login Experience on Tenant**

**Owner:** Computle\
Configure the tenant to enable the new automatic login presentation feature.

{% hint style="warning" %}
Without this step, the Client will default to traditional authentication. The desired state is that clicking "Connect" will present you with a Windows login screen, with no request for the user's password.
{% endhint %}

**2.5 Test User Login Experience**

**Owner:** Client/MSP/IT

1. Test user logs out of Computle Client completely
2. Test user logs back into Computle Client
3. Verify automatic presentation of Windows login screen
4. Confirm no double-authentication required
5. Test all normal workflows (file access, applications, etc.)

***

#### Phase 3: Full Deployment

**Objective:** Migrate all remaining Computle machines

**Owner:** Computle/MSP/IT

**Steps:**

**3.1 Schedule Migration Window**

Coordinate with team to identify optimal migration time (e.g., outside business hours or during low-usage period)

**3.2 Migrate Remaining Machines**

**Owner:** Computle

For each remaining Computle machine:

1. Verify public access is disabled
2. Run authentication migration script (see Phase 2.3)
3. Verify successful completion
4. Document any issues

**3.3 User Login Refresh**

**Owner:** Computle/MSP/IT

Communication to all users:

* Users must log out of Computle Client completely
* Log back in to receive the new experience
* First login will present Windows authentication screen
* Subsequent logins will be seamless

***

#### Phase 4: Web Access Decommissioning

**Objective:** Disable legacy web access and confirm stability

**Owner:** Computle

**Steps:**

**4.1 Disable Web Access**

**Owner:** Computle

Remove public web access for all Computle machines:

* Update firewall rules at a tenant-level.
* Confirm with telemetry that the ports are unreachable via the public internet.

**4.2 Verification Period**

**Owner:** Computle/MSP/IT

Monitor for 1-2 weeks:

* Verify all users connecting successfully via Computle Client
* Confirm no web access attempts or errors
* Monitor machine performance and stability
* Collect user feedback

***

### Rollback Plan

If issues arise during migration:

#### During Phase 2 (Pilot)

* Re-enable web authentication on test machine
* Revert tenant configuration
* Analyze issues before proceeding

#### During Phase 3 (Full Deployment)

* Pause migration of remaining machines
* Keep migrated machines on new system if stable
* Address issues before continuing
* Consider extended pilot phase with more users

#### Script to Re-enable Authentication (if needed)

```powershell
$authRegPath = "Registry::HKEY_USERS\S-1-5-18\Software\GSettings\com\nicesoftware\dcv\security\authentication"

# Set authentication back to system
Set-ItemProperty -Path $authRegPath -Name "(Default)" -Value "system"

Restart-Service -Name "dcvserver" -Force

"Authentication mode changed back to system."
```

***

### Computle Portal: Connecting to Machines

Administrators can connect to all machines using the [Computle Portal ](https://portal.computle.com/)> Workstations > DCV.

<figure><img src="/files/BxqwEaqc78THtdvi6fPa" alt=""><figcaption></figcaption></figure>

***

### Questions or Concerns?

Contact Jake Elsley or your Computle account representative to discuss or refine any step as required.

***

*This migration guide is based on Computle Client v3.0.8 and DCV authentication configuration scripts. Always refer to official Computle documentation for the latest information.*


# Computle Client v3: Enterprise App Registration

Computle Client uses OAth 2.0 to authenticate users against your existing iDP, such as Entra ID. Additionally, Directory Sync automatically syncs Entra ID users to Computle, enabling machine assignment to users.

## Step 1: Computle Client Login Setup

### Steps

#### 1. Download and Install

* Download [Computle Client](/installers/installers)
* Follow installation steps

#### 2. Login Process

* Click **"Login with Microsoft"**
* Enter your work email
* Enter your password

#### 3. Grant Application Consent

* If requested, grant consent for Computle Client to:
  * Sign you in and read your profile
  * Maintain access to data you have given it access to
* Select **"Consent on behalf of your organisation"** if applicable

{% hint style="warning" %}
Admin approval may be required, See [Microsoft Learn](https://learn.microsoft.com/en-us/entra/identity/enterprise-apps/review-admin-consent-requests) for guidance.
{% endhint %}

#### 4. Approval by Computle

* Once approved by Computle, you'll see your available machines. This is a manual step which takes up to 24 hours.

***

## Step 2: Portal Directory Sync Setup

### Setup Steps

#### 1. Grant Admin Consent

* Navigate to [**Directory Sync**](https://portal.computle.com/directory-sync) in sidebar
* Click **"Grant Admin Consent"** button,

{% hint style="warning" %}
If approval is required, you will need to repeat these steps **in full** once permission is granted. The sync process will fail otherwise.
{% endhint %}

<figure><img src="/files/VW1v2pOleIsuZpE1zqgD" alt=""><figcaption></figcaption></figure>

<figure><img src="/files/KvorariZi3hDBpN74FfW" alt=""><figcaption></figcaption></figure>

<figure><img src="/files/PQuLmMQ8fBTWvX7wvTKG" alt=""><figcaption></figcaption></figure>

#### 2. Click Sync Now

* Click **"Sync Now"** button to start synchronization

<figure><img src="/files/eIZ0GqrAAjZz1EkM26f2" alt=""><figcaption></figcaption></figure>

#### 3. Verify Users

* Check **Users** section to see synced accounts

<figure><img src="/files/r2NZe3LmzRWtHauPYsPF" alt=""><figcaption></figcaption></figure>

### You're set

Users from Entra ID are now available in Computle for machine assignment and access management.

***

## Requied Permissions

#### Computle OAuth 2.0 (Portal Login)

Used for user authentication to access the app and portal:

| Permission    | Type      | Description                   |
| ------------- | --------- | ----------------------------- |
| **email**     | Delegated | View users' email address     |
| **openid**    | Delegated | Sign users in                 |
| **profile**   | Delegated | View users' basic profile     |
| **User.Read** | Delegated | Sign in and read user profile |

#### Computle OAuth 2.0 (Tenant Sync)

Used for directory synchronization with these Microsoft Graph permissions:

| Permission               | Type        | Description                   |
| ------------------------ | ----------- | ----------------------------- |
| **Directory.Read.All**   | Application | Read directory data           |
| **Group.Read.All**       | Application | Read all groups               |
| **GroupMember.Read.All** | Application | Read all group memberships    |
| **User.Read.All**        | Application | Read all users' full profiles |

> **Microsoft Graph API** enables applications to access Microsoft 365 data and intelligence through a unified REST API endpoint.


# Computle Client: Application Architecture

This document provides a comprehensive overview of the Computle Client architecture, including service interactions, network configuration, and system comp

### Overview

The Computle Client is a cross-platform desktop application that provides secure remote access to virtual workstations. It operates as part of a distributed system comprising multiple backend services that handle authentication, Point-to-Point tunnel management, and machine assignment.

#### Core Components

| Component              | Purpose                                   |
| ---------------------- | ----------------------------------------- |
| **Computle Client**    | Desktop application for Windows and macOS |
| **Auth System**        | User authentication and tenant management |
| **WireGuard Manager**  | Point-to-Point configuration management   |
| **Assignment Manager** | Machine-to-user assignment tracking       |
| **Computle Portal**    | Web-based administration interface        |

***

### System Architecture

```
┌─────────────────────────────────────────────────────────┐
│                    COMPUTLE CLIENT                       │
│  ┌─────────────────────────────────────────────────┐   │
│  │  Electron Application (main.js)                  │   │
│  │  - Window management                             │   │
│  │  - IPC handlers                                  │   │
│  │  - Protocol handlers (computle-vdi://)           │   │
│  └─────────────────────────────────────────────────┘   │
│                         │                               │
│  ┌─────────────────────────────────────────────────┐   │
│  │  Services Layer                                   │   │
│  │  - Authentication    - WireGuard management      │   │
│  │  - Connectivity      - Telemetry                 │   │
│  │  - DCV/RDP/TGX       - Logging                   │   │
│  └─────────────────────────────────────────────────┘   │
│                         │                               │
│  ┌─────────────────────────────────────────────────┐   │
│  │  Tunnel Service (.NET Background Service)        │   │
│  │  - REST API (Port 28982)                         │   │
│  │  - WireGuard interface management                │   │
│  │  - DNS resolution                                │   │
│  └─────────────────────────────────────────────────┘   │
└─────────────────────────────────────────────────────────┘
                          │
                          ▼
┌─────────────────────────────────────────────────────────┐
│                  BACKEND SERVICES                        │
├─────────────────────────────────────────────────────────┤
│  Auth System        │  WireGuard Manager                │
│  auth.computle.com  │  wg.computle.com                  │
│  Port: 443 (HTTPS)  │  Port: 443 (HTTPS)                │
├─────────────────────────────────────────────────────────┤
│  Assignment Manager │  Computle Portal                  │
│  Internal service   │  portal.computle.com              │
│  Port: 3002         │  Port: 443 (HTTPS)                │
└─────────────────────────────────────────────────────────┘
```

***

### Network Configuration

#### Ports and Endpoints

**Client-Side Services**

| Service            | Port  | Protocol | Purpose                 |
| ------------------ | ----- | -------- | ----------------------- |
| Tunnel Service API | 28982 | HTTP     | Local tunnel management |

**Backend Services**

| Service           | Endpoint                      | Purpose                            |
| ----------------- | ----------------------------- | ---------------------------------- |
| Auth System       | `https://auth.computle.com`   | Authentication and user management |
| WireGuard Manager | `https://wg.computle.com`     | VPN configuration management       |
| Computle Portal   | `https://portal.computle.com` | Web administration                 |

**WireGuard Point-to-Point Tunnel**

| Parameter            | Default Value    |
| -------------------- | ---------------- |
| Server Port          | 51820 (UDP)      |
| DNS                  | 1.1.1.1, 8.8.8.8 |
| MTU                  | 1420             |
| Persistent Keepalive | 25 seconds       |

***

### Tunnel Service API

The Tunnel Service runs as a background service and provides a local REST API for tunnel management.

#### Endpoints

| Endpoint             | Method | Authentication | Description            |
| -------------------- | ------ | -------------- | ---------------------- |
| `/health`            | GET    | None           | Health check           |
| `/api/tunnel/status` | GET    | API Key        | Get tunnel status      |
| `/api/tunnel/start`  | POST   | API Key        | Start WireGuard tunnel |
| `/api/tunnel/stop`   | POST   | API Key        | Stop WireGuard tunnel  |
| `/api/tunnel/reload` | POST   | API Key        | Reload configuration   |
| `/api/tunnel/paths`  | GET    | API Key        | Get service paths      |

#### Authentication

The Tunnel Service uses API key authentication via the `X-API-Key` header. The API key is automatically generated on first run.

**API Key Location:**

* **macOS**: `/Library/Application Support/Computle/2025.3.0-Tunnel/api_key.txt`
* **Windows**: `C:\Users\Public\Documents\Computle\2025.3.0-Tunnel\api_key.txt`

***

### Authentication Flow

Computle Client supports two authentication methods:

#### Microsoft Entra ID (Primary)

1. User initiates login via the client
2. Microsoft OAuth popup opens in the desktop application
3. User authenticates with Microsoft credentials
4. Client receives authorization code
5. Code exchanged for Microsoft access token
6. Token sent to Auth System for validation
7. Auth System returns Computle JWT token
8. Client stores session for subsequent requests

#### Magic Link Authentication

1. User enters email address
2. Auth System generates secure magic link token
3. Email sent to user with authentication link
4. User clicks link to approve authentication
5. Client polls for approval status
6. Once approved, JWT token is returned
7. Client stores session for subsequent requests

#### Token Management

* **Token Expiry**: 90 days (configurable per tenant)
* **Storage**: Secure IPC-accessible storage
* **Validation**: Tokens validated against tenant-specific JWT secrets

***

### WireGuard **Point-to-Point Tunnel** Integration

#### Configuration Flow

1. **Authentication**: User authenticates with Computle Client
2. **Configuration Request**: Client requests VPN config from WireGuard Manager
3. **Config Generation**: Server generates client configuration with allocated IP
4. **Config Storage**: Configuration saved to local filesystem
5. **Tunnel Start**: Client instructs Tunnel Service to start VPN
6. **DNS Resolution**: Tunnel Service resolves server endpoint
7. **Connection**: WireGuard tunnel established

#### Configuration Storage

**macOS:**

```
/Library/Application Support/Computle/2025.3.0-Client/token/ComputleManagedTunnel.conf
```

**Windows:**

```
C:\Users\Public\Documents\Computle\2025.3.0-Client\token\ComputleManagedTunnel.conf
```

#### WireGuard Configuration Format

```ini
[Interface]
PrivateKey = <client_private_key>
Address = <allocated_ip>/32
DNS = 1.1.1.1, 8.8.8.8
MTU = 1420

[Peer]
PublicKey = <server_public_key>
AllowedIPs = <site_allowed_ips>
Endpoint = <server_endpoint>:<port>
PersistentKeepalive = 25
```

#### Platform-Specific Implementation

**macOS:**

* Uses `wg-quick` tool from Homebrew
* Requires administrator privileges (sudo)
* Dynamic `utun` interface allocation

**Windows:**

* Uses WireGuard system driver
* Managed via Windows Service
* Requires elevated privileges for tunnel operations

***

### Machine Assignment

#### Assignment Workflow

1. **Administrator assigns machine** via Computle Portal
2. **Assignment stored** in Assignment Manager database
3. **User authenticates** with Computle Client
4. **Client queries** assigned machine details
5. **Connection details returned** (IP, port, connection method)
6. **User connects** via RDP, TGX, or DCV

#### Connection Methods

| Method  | Description                        | Port   |
| ------- | ---------------------------------- | ------ |
| **RDP** | Remote Desktop Protocol            | 3389   |
| **TGX** | High-performance graphics protocol | Varies |
| **DCV** | NICE DCV interactive streaming     | Varies |

***

### Service Communication

#### Auth System Integration

The Auth System (`auth.computle.com`) handles all authentication and authorization:

**Key Endpoints:**

* `POST /api/auth/microsoft` - Microsoft token exchange
* `POST /api/auth/request` - Request magic link
* `GET /api/auth/status/:token` - Check auth status
* `GET /api/auth/token/:token` - Retrieve JWT
* `POST /api/auth/validate` - Validate JWT token

#### WireGuard Manager Integration

The WireGuard Manager (`wg.computle.com`) manages VPN configurations:

**Key Endpoints:**

* `GET /api/configs` - Get user configurations
* `GET /api/configs/mode` - Check operation mode (on-demand/legacy)
* `POST /api/configs/create-on-demand` - Create new configuration
* `POST /api/configs/:id/checkout` - Reserve configuration
* `POST /api/configs/:id/checkin` - Release configuration

#### Assignment Manager Integration

The Assignment Manager tracks machine assignments:

**Key Endpoints:**

* `GET /api/machines/my` - Get user's assigned machine
* `GET /api/machines` - List tenant machines (admin)
* `POST /api/assignments/assign` - Assign machine to user
* `POST /api/assignments/unassign` - Remove assignment

***

### Security Features

#### Transport Security

* All external communications use HTTPS/TLS
* WireGuard tunnel provides encrypted VPN connection
* Local Tunnel Service API bound to localhost only

#### Authentication Security

* JWT tokens with tenant-specific secrets
* WebAuthn/FIDO2 support for hardware security keys
* MFA support (TOTP authenticator apps)
* Magic link tokens expire after 15 minutes

#### Tunnel Service Security

* API key authentication for all management endpoints
* Health check endpoint available without authentication
* Keys auto-generated using cryptographic random bytes
* Service runs with minimal required privileges

#### Configuration Security

* VPN configurations encrypted at rest (AES-256-CBC)
* Private keys never transmitted in plaintext
* Configuration cleanup on tunnel stop

***

### Diagnostics and Monitoring

#### Connectivity Testing

The client includes built-in diagnostic tools:

* **Ping Test**: ICMP ping with latency measurement
* **DNS Resolution**: Domain name lookup verification
* **Port Connectivity**: TCP port availability check
* **HTTP Request**: HTTPS endpoint validation

#### Logging

**Client Logs:**

* Location varies by platform (see file structure above)
* Structured logging with timestamps
* Includes connection events, errors, and diagnostics

**Tunnel Service Logs:**

* File-based logging with size rotation (10MB limit)
* Includes tunnel state changes and API requests
* Separate log files for service and tunnel operations

#### Telemetry Events

| Event           | Description               |
| --------------- | ------------------------- |
| `app_start`     | Application launched      |
| `app_close`     | Application closed        |
| `button_click`  | UI interaction            |
| `logs_uploaded` | Diagnostic logs submitted |

***

### Deep Linking

Computle Client supports deep linking via the `computle-vdi://` protocol handler.

#### URL Format

```
computle-vdi://connect?type=<protocol>&dns=<hostname>&bypass=<boolean>
```

#### Parameters

| Parameter | Values              | Description             |
| --------- | ------------------- | ----------------------- |
| `type`    | `dcv`, `rdp`, `tgx` | Connection protocol     |
| `dns`     | hostname            | Target machine DNS name |
| `bypass`  | `true`, `false`     | Bypass VPN requirement  |

#### Example

```
computle-vdi://connect?type=dcv&dns=workstation-01.internal&bypass=false
```

***

### Error Handling and Recovery

#### Tunnel Auto-Recovery

The Tunnel Service monitors connection health and automatically recovers from failures:

* **Health Monitoring**: 30-second interval status checks
* **Failure Detection**: 3 consecutive failures trigger restart
* **Exponential Backoff**: Increasing delays between retry attempts
* **DNS Retries**: Up to 5 attempts with exponential backoff

#### Connection Resilience

* Automatic reconnection on network changes
* Persistent keepalive maintains NAT traversal
* Configuration preserved across service restarts
* Graceful degradation on partial failures

***

### Multi-Tenant Architecture

Computle operates as a multi-tenant system with complete data isolation:

#### Tenant Isolation

* Each tenant has dedicated JWT secrets
* Configurations filtered by tenant ID
* Separate VPN sites per tenant
* Machine assignments scoped to tenant

#### Site Management

Sites represent physical or logical data center locations:

* Each site has unique WireGuard server configuration
* Tenants mapped to available sites
* IP ranges allocated per site
* High availability support per site

***

### Version Information

| Component        | Current Version   |
| ---------------- | ----------------- |
| Computle Client  | 3.0.8             |
| Tunnel Service   | .NET 9.0          |
| Protocol Handler | `computle-vdi://` |

***

### Additional Resources

* [Computle Client Installation Guide](https://docs.computle.com)
* [Troubleshooting Guide](https://docs.computle.com)
* [Administrator Portal Guide](https://docs.computle.com)

For support, please contact your account manager.


# Computle Client: Changelog

All notable changes to the Computle Client will be documented in this file.

#### \[3.0.8.3] - 2025-12-03

**Fixed**

* Improved connection stability and reliability
* Multi-monitor support now works correctly on Windows platforms
* Enhanced automatic cleanup of temporary files

**Changed**

* Streamlined login experience with fewer notifications

#### \[3.0.8] - 2025-11-11

**Added**

* Client now detects when you close the DCV viewer and terminates background processes automatically
* DCV launches automatically after successful login
* Client automatically detects when your machine assignment changes without requiring logout

**Changed**

* Timestamp-based log parsing for improved reliability across log rotations
* Machine assignment polling occurs every 5 seconds

**Fixed**

* Enhancaes made to telemetry collection and log exports.

#### \[3.0.7] - 2025-10-29

**Added**

* Enhanced diagnostics and telemetry for improved support experience
* Automatic network performance monitoring
* Bandwidth usage tracking
* Manual log collection via diagnostics page
* Command-line flag for immediate log collection on startup
* Intelligent VPN routing based on assigned machines

**Fixed**

* Network performance metrics accuracy
* Bandwidth tracking reliability on Windows
* Log collection completeness
* VPN tunnel reconnection behavior on logout
* Single sign-on tunnel connectivity
* Installation process reliability
* Certificate validation workflows
* Connection dialog stability

**Security**

* Updated dependencies to address security vulnerabilities
* Fixed CVE-2025-7783
* Enhanced tunnel service security

#### \[3.0.6] - 2025-10-05

**Fixed**

* General bug fixes and installer improvements
* Diagnostic reporting reliability

#### \[3.0.5] - 2025-07-06

**Added**

* Enhanced network diagnostics tools
* Helpful messaging for users with no machines assigned
* Improved diagnostic reporting

**Changed**

* Updated About page styling and branding
* Simplified version information display
* Improved diagnostics accuracy

**Fixed**

* Diagnostic tracking reliability
* Diagnostics page functionality
* Version display in settings

**Removed**

* Simplified diagnostics output for better clarity
* Streamlined diagnostics interface

#### \[3.0.4] - 2025-07-05

**Security**

* Fixed critical security vulnerabilities
* Enhanced code protection

**Changed**

* Updated settings page with enhanced privacy disclosure
* Improved user messaging

#### \[3.0.3] - 2025-07-04

**Changed**

* Updated application icon across all platforms
* Enhanced icon resolution support

#### \[3.0.2] - 2025-06-15

**Fixed**

* Improved application startup performance
* Enhanced diagnostic reliability
* Optimized background services

#### \[3.0.1] - 2025-06-15

**Added**

* Log collection functionality for better support
* Enhanced version tracking

**Fixed**

* Login flow reliability
* Authentication performance

#### \[3.0.0] - 2025-06-17

**Added**

* View toggle for simplified or advanced machine list display
* Responsive window sizing
* Enhanced visual design for machine cards
* Improved user experience with automatic layout optimization
* Vertical layout for better readability

**Changed**

* Redesigned machine list interface for improved usability
* Simplified and modernized UI layout
* Refined typography and spacing throughout
* Optimized window sizing behavior
* Improved status information display

**Fixed**

* Window sizing and layout issues
* Interface padding and alignment
* Responsive design improvements

#### \[Beta] - 2025-06-01 to 2025-06-16

**Added**

* Enterprise Single Sign-On authentication
* Multi-machine management interface
* Automatic secure VPN tunnel management
* Remote desktop connectivity
* System tray integration
* Automatic software updates
* Comprehensive settings and diagnostics
* Dynamic background images
* Network connectivity monitoring
* Cross-platform installer support
* Enhanced logging for support and troubleshooting

**Changed**

* Streamlined login experience
* Improved visual experience with curated backgrounds
* Simplified setup and onboarding process

**Fixed**

* VPN connection stability and reliability
* Connection management improvements
* Secure certificate handling
* Authentication flow reliability
* Platform-specific installation issues
* Installer process improvements

#### \[Initial Release] - 2025-05-26

**Added**

* Initial application release
* Core application framework
* User interface foundation
* Logging and diagnostics infrastructure
* Secure connection support
* Background service architecture


# Computle - End User Guide

This guide is intended for end users looking to access their Computle Machine. If you are an administrator, please follow the Administrator Guide.

{% hint style="info" %}
**Time Required**

Please allow 15 minutes.
{% endhint %}

{% hint style="info" %}
**Your Own Device**

This guide assumes that you are using your own device. If you are using Computle Device, or you are not sure, please ask your system administrator.
{% endhint %}

{% hint style="warning" %}
**Computle Gateway Token**

Ensure that your administrator has shared a Computle Gateway token with you.
{% endhint %}

***

## Stage 1 of 3: Install Computle Gateway

1. Download WireGuard client to your device.

* [Windows](https://download.wireguard.com/windows-client/wireguard-amd64-0.5.3.msi)
* [Mac](https://itunes.apple.com/us/app/wireguard/id1451685025?ls=1\&mt=12)

2. Launch the downloaded file.

<div align="left"><figure><img src="/files/Qc2RqnaeXpKraXiDNk2o" alt=""><figcaption></figcaption></figure></div>

2. Install WireGuard

<div align="left"><figure><img src="/files/2c72ZVFLc6lIPuDY7vu2" alt=""><figcaption></figcaption></figure></div>

3. Launch WireGuard
4. Click "Import tunnel(s) from file".

<div align="left"><figure><img src="/files/0OyWizs8ypWsGEvL7he1" alt=""><figcaption></figcaption></figure></div>

5. Select the token that your administrator sent to you and click Open.

<div align="left"><figure><img src="/files/5DMfJM3FYDriyGxX0K4w" alt=""><figcaption></figcaption></figure></div>

6. Click Activate.

<div align="left"><figure><img src="/files/uOjCae4fj0Hvq3OhJUyf" alt=""><figcaption></figcaption></figure></div>

6. Proceed to Stage 2 of 3.

{% hint style="info" %}
If you receive a file name error, ensure that there are no spaces in your token file's name, or extra numbers. For example, if you downloaded the file multiple times, delete all copies, and re-download the token.
{% endhint %}

***

## Stage 2 of 3: Install NICE DCV

1. Download NICE DCV:

* [Windows](https://d1uj6qtbmh3dt5.cloudfront.net/nice-dcv-client-Release.msi)
* [Mac](https://d1uj6qtbmh3dt5.cloudfront.net/nice-dcv-viewer.x86_64.dmg)

2. Launch the downloaded file.

<div align="left"><figure><img src="/files/va6lWw9zPJzrNF09V1GJ" alt=""><figcaption></figcaption></figure></div>

<div align="left"><figure><img src="/files/yrvUtdHcyu6JTMcy11Tm" alt=""><figcaption></figcaption></figure></div>

3. Read the EULA

<div align="left"><figure><img src="/files/BkkLffIA1me2HLllwK31" alt=""><figcaption></figcaption></figure></div>

4. Select the X dropdown and click **"Will be installed on local hard drive"**

<div align="left"><figure><img src="/files/x4XRx0IrSu1q35a3D1km" alt=""><figcaption></figcaption></figure></div>

5. Click Next

<div align="left"><figure><img src="/files/ioRkKzFTO064fduOKjl7" alt=""><figcaption></figcaption></figure></div>

6. Click Install

<div align="left"><figure><img src="/files/OIFekTP9On9zoK0ktQIw" alt=""><figcaption></figcaption></figure></div>

7. **Windows Users Only**: Install the latest [Microsoft Visual C++ Redistributable](https://aka.ms/vs/17/release/vc_redist.x64.exe).

<div align="left"><figure><img src="/files/Z67bNNqkqP6R55dy1Yfw" alt=""><figcaption></figcaption></figure></div>

***

## Stage 3 of 3: Launch NICE DCV

1. **Launch NICE DCV**

On Windows, search your Start Menu, and on Mac, search your Applications folder.

<div align="left"><figure><img src="/files/cZVgpG877aN1tmAT5rhW" alt=""><figcaption></figcaption></figure></div>

2. **Enter your Computer name**

In Hostname, enter the Computer name provided by your administrator.

<div align="left"><figure><img src="/files/KBcpXA5omRW2YqQLkfWU" alt=""><figcaption></figcaption></figure></div>

3. Click *Connect.*
4. If promoted, click Trust and Connect

<div align="left"><figure><img src="/files/vtUCzDqIHP5nlsJqgSLx" alt=""><figcaption></figcaption></figure></div>

4. **Enter your username**

In Login, enter the login name provided by your administrator.\\

<div align="left"><figure><img src="/files/OxIlNntJ927utT5OIRSM" alt=""><figcaption></figcaption></figure></div>

5. **Enter your password**

In Password, enter the password provided by your administrator.\
\
Then, click OK.

***

## Tip

When you connect again, click the down arrow to retrive your saved machine(s).

<div align="left"><figure><img src="/files/OAlmAN6Dmk89tZCwqg2m" alt=""><figcaption></figcaption></figure></div>

***

**Gateway Privacy**

Computle Gateway acts as a network tunnel enabling you to access your company resources. By default, Computle Gateway does not monitor, collect, or log data sent to network resources outside of your company resources. When you are not using Computle Gateway you are free to disconnect the client. However, during normal use, your internet and network traffic is routed to your home/office router.


# iPad/Tablet

**iPad**

You can connect to Computle on an iPad/tablet by using the NICE DCV web client.

Simply navigate to the address or IP of your machine in a web browser, ensuring that you select https, and append port 8443.

As an example:

`https://machines.computle.net:8443`


# Network Requirements

## **Ports and endpoints**

**Computle requires the following network-level access:**

* Unrestricted access to port 8443 on the target machine.
* Unrestricted access to access *\*.computle.net.*

**Network speed**

* Each connecting user should have at least 10Mbps of download speed.
* For best performance, you should have less than 50ms of latency. This can be checked via the NICE DCV application > Cog > Streaming Mode.

***

## Testing

If you use security solutions such as Zscaler, please ensure that you whitelist these domains.

**PowerShell**

To test connectivity, you can run the following PowerShell command, replacing "machine.computle.net" with your machine or network ID:

`Test-NetConnection -ComputerName machine.computle.net -Port 8443`

**Web browser**

On instances where the web client is enabled, you can navigate to the following webpage, replacing "machine.computle.net" with your machine ID. This will present a NICE DCV connection screen.

`https://machine.computle.net:8443`


# Unattended Install

This PowerShell script will automatically download and install the latest version of the NICE DCV client.

```sh
$dcvProcess = Get-Process -Name dcvviewer -ErrorAction SilentlyContinue
if ($dcvProcess) {
    Write-Host "DCV Viewer is running. Closing it..."
    Stop-Process -Name dcvviewer -Force
}

$dcvUrl = "https://d1uj6qtbmh3dt5.cloudfront.net/nice-dcv-client-Release.msi"
$dcvOutputFile = "$env:TEMP\nice-dcv-client-Release.msi"

Write-Host "Downloading the file. This may take some time..."
$dcvWebClient = New-Object System.Net.WebClient
$dcvWebClient.DownloadFile($dcvUrl, $dcvOutputFile)
Write-Host "Download completed."

Write-Host "Installing the MSI package..."
Start-Process -FilePath "msiexec.exe" -ArgumentList "/i $dcvOutputFile /quiet /norestart" -Wait
Write-Host "Installation completed."

Write-Host "Setup completed successfully."

$vsRuntimeUrl = "https://download.visualstudio.microsoft.com/download/pr/0ff148e7-bbf6-48ed-bdb6-367f4c8ea14f/bd35d787171a1f0de7da6b57cc900ef5/windowsdesktop-runtime-8.0.5-win-x64.exe"
$vsRuntimeOutputFile = "C:\Windows\Computle\installers\windowsdesktop-runtime-8.0.5-win-x64.exe"

$vsRuntimeOutputDir = [System.IO.Path]::GetDirectoryName($vsRuntimeOutputFile)
if (-not (Test-Path $vsRuntimeOutputDir)) {
    New-Item -Path $vsRuntimeOutputDir -ItemType Directory | Out-Null
}

$vsRuntimeDownloadScript = {
    param (
        [string]$downloadUrl,
        [string]$outputFile
    )

    $outputDir = [System.IO.Path]::GetDirectoryName($outputFile)
    if (-not (Test-Path $outputDir)) {
        New-Item -Path $outputDir -ItemType Directory | Out-Null
    }

    $webClient = New-Object System.Net.WebClient
    $webClient.DownloadFile($downloadUrl, $outputFile)
}

$vsRuntimeJob = Start-Job -ScriptBlock $vsRuntimeDownloadScript -ArgumentList $vsRuntimeUrl, $vsRuntimeOutputFile

Wait-Job -Job $vsRuntimeJob
Receive-Job -Job $vsRuntimeJob

Write-Host "Download completed."

Start-Process -FilePath $vsRuntimeOutputFile -ArgumentList "/quiet" -NoNewWindow -Wait
Write-Host "Installation completed."

```


# Hardware

**Computle Device**

For a seamless experience, opt for Computle Device.

**BYOD**

Alternatively, users can access Computle via any [Windows or Mac device](/onboarding/computle-end-user-guide).


# End User Guide (Canary Release)

This guide is intended for end users looking to access their Computle Machine using the **Canary Release**. If you are an administrator, please follow the Administrator Guide.

{% hint style="info" %}
**Time Required**

Please allow 15 minutes.
{% endhint %}

{% hint style="info" %}
**Your Own Device**

This guide assumes that you are using your own device. If you are using Computle Device, or you are not sure, please ask your system administrator.
{% endhint %}

{% hint style="warning" %}
**Computle Gateway Token**

Ensure that your administrator has shared a Computle Gateway token with you.
{% endhint %}

***

## Stage 1 of 3: Install Computle Gateway

1. Download WireGuard client to your device.

* [Windows](https://download.wireguard.com/windows-client/wireguard-amd64-0.5.3.msi)

2. Launch the downloaded file.

<div align="left"><figure><img src="/files/Qc2RqnaeXpKraXiDNk2o" alt=""><figcaption></figcaption></figure></div>

2. Install WireGuard

<div align="left"><figure><img src="/files/2c72ZVFLc6lIPuDY7vu2" alt=""><figcaption></figcaption></figure></div>

3. Launch WireGuard
4. Click "Import tunnel(s) from file".

<div align="left"><figure><img src="/files/0OyWizs8ypWsGEvL7he1" alt=""><figcaption></figcaption></figure></div>

5. Select the token that your administrator sent to you and click Open.

<div align="left"><figure><img src="/files/5DMfJM3FYDriyGxX0K4w" alt=""><figcaption></figcaption></figure></div>

6. Click Activate.

<div align="left"><figure><img src="/files/uOjCae4fj0Hvq3OhJUyf" alt=""><figcaption></figcaption></figure></div>

6. Proceed to Stage 2 of 3.

{% hint style="info" %}
If you receive a file name error, ensure that there are no spaces in your token file's name, or extra numbers. For example, if you downloaded the file multiple times, delete all copies, and re-download the token.
{% endhint %}

***

## Stage 2 of 3: Install Computle Client

1. Download Computle Client for Windows:

{% hint style="info" %}
[Computle\_Client\_x64\_2024.09.01.0.exe](https://downloads.oncomputle.com/Computle_Client_x64_2024.09.01.0.exe)
{% endhint %}

2. Enter your tenant UUID, username, and password.
3. Read the EULA
4. Click Install

***

## Stage 3 of 3: Launch Computle Client

1. Launch Computle Client
2. Click on Settings and ensure that the tenant name matches your organisation.
3. Connecting to your assigned machine is easy. Simply enter your username, and your assigned machine is automatically presented.

<div align="left"><figure><img src="https://blog.computle.com/content/images/2024/09/image-2-1-1.png" alt="" height="549" width="403"><figcaption><p>Computle Client App</p></figcaption></figure></div>

<div align="left"><figure><img src="https://blog.computle.com/content/images/2024/09/image-3-1-1-1.png" alt="" height="549" width="404"><figcaption></figcaption></figure></div>

***

**Gateway Privacy**

Computle Gateway acts as a network tunnel enabling you to access your company resources. By default, Computle Gateway does not monitor, collect, or log data sent to network resources outside of your company resources. When you are not using Computle Gateway you are free to disconnect the client. However, during normal use, your internet and network traffic is routed to your home/office router.


# Administrator Guide

To access Computle, you require both a Computle Gateway account, and a Computle Machine.

Computle Gateway acts as a network tunnel enabling you to access your tenant resources. Once you have established a connection, you can then access your Computle Machines.

**To get started, choose your desired pathway:**

* If you have not already onboarded a user into Computle Gateway for SMEs, follow [these ](/onboarding/administrator-guide/computle-gateway-for-smes)instructions.
* If you have enrolled a user into Computle Gateway, create a machine [here](/onboarding/administrator-guide/machine-portal).


# Computle Gateway for SMEs

**Computle Gateway** is our free network access solution, offering secure, low-latency, and high-performance encrypted connections for both SMEs and Enterprises. Built for **High Availability (HA)**, Computle Gateway ensures that users can always access their resources reliably.

## Get started

1. Head to your Computle Gateway portal.
2. Login with your supplied password.

<div align="left"><figure><img src="/files/AcQ0y0z7GssqeY9GcKXB" alt=""><figcaption></figcaption></figure></div>

3. Click New Client.

<div align="left"><figure><img src="/files/iO28l33t9cspB9AcIrUF" alt=""><figcaption></figcaption></figure></div>

4. Enter a name and click Create.

<div align="left"><figure><img src="/files/ZQpYUWIT9SKTW4sJ3pe5" alt=""><figcaption></figcaption></figure></div>

5. Click the Download button.

<div align="left"><figure><img src="/files/P5iH0MtQprVovY0LlGXQ" alt=""><figcaption></figcaption></figure></div>

6. Share the token with the end user.


# Computle Device

Computle Device is a proprietary offering that provides seamless connectivity to your assigned machine. The device is locked down and remtotely managed and comes with **5-years** of servicing as standard.

<figure><img src="/files/dc9ds4gVFqjeYJ1OYc2n" alt=""><figcaption></figcaption></figure>

### Specifications

* Intel 12th Generation CPU with integrated graphics.
* 16GB DDR4 memory.
* Windows 11 Professional in a locked-down state.
* Display Outputs:
  * 1 x DisplayPort
  * 1 x HDMI
  * Support for DisplayPort daisy chaining on selective monitors.
* 4x rear USB
* 2x front USB
* Realtek 1Gb Ethernet
* Realtek 7.1 Surround Sound High Definition Audio CODEC\*
* 12v power adapter.

***

## Features

### Easy login

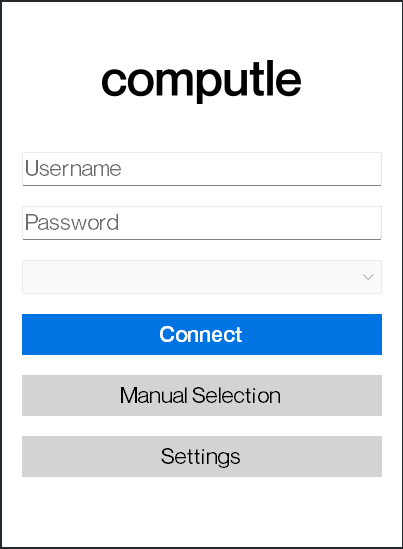
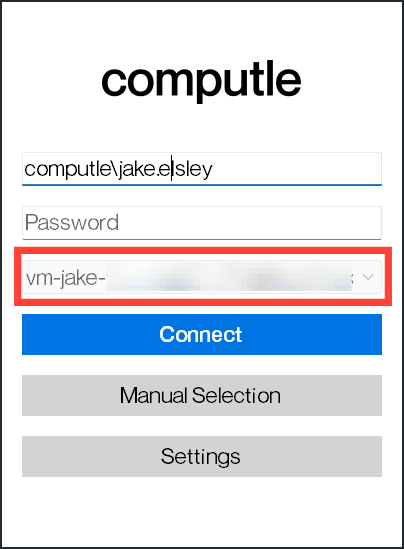
**Connecting to Computle is easy:** Simply enter your credentials and click Connect.

Computle automatically detects and presents the assigned machine based on the user’s credentials.

This assignment can be manged from the Computle Agent.

*Pre-credentials*

![](/files/t02DiUY3lwXL5BWr2vzp)

*Post-credentials*

![](/files/a0imKl7kTrMPXVvsIFNB)

### Features

* **Easy**: Users simply input their credentials, and the device automatically presents the correct machine, making the connection process fast and secure.
* **Remotely managed**: Computle can remotely control, update, and troubleshoot the device without needing physical access, maintaining efficiency across multiple locations.
* **Triple 4K support**: Built for performance, the Computle Device supports triple 4K displays, making it ideal for power users in environments such as design, engineering, and architecture.
* **Full support for video valls and audio**: The Computle Device is fully capable of handling high-quality video calls and audio.


# Machine Portal

## **Overview**

Each customer gets access to a dedicated machine portal, enabling you to perform tasks such as workstation reboots, password resets, and rebuilds.

<figure><img src="/files/SvARNgnMy5dWCflynWWT" alt=""><figcaption><p>Computle Machine Portal</p></figcaption></figure>

***

## **Portal access**

{% hint style="warning" %}
As part of our tenant-defaults, access to this portal is available only via Computle Gateway, or another supported VPN/Zero Trust solutions.
{% endhint %}

By default, each tenant is provisioned with one user who has full administrative rights and access to the portal. Multi-Factor Authentication (MFA) is required.

To access the portal, navigate to the unique URL provided to you, which typically follows the format:

```
tenantID.computle.net
```

If you haven't received this information, or require further assistance, please contact Computle support.

***

## **Machine controls**

* **Boot**: This button powers on the machine if it is currently powered off. Use this when you need to start a machine from a shutdown or powered-off state.
* **Shutdown**: Clicking this button safely powers down the machine.
* **Restart**: This button reboots the machine without powering it off completely.
* **Power Off**: This option forcibly turns off the machine, similar to cutting power to a physical system. This should only be used if the machine is unresponsive.

***

## **Image deployment**

You can reimage Computle Machines using the Rebuild button. [Image ](https://docs.computle.com/service-delivery/service-delivery-architecture/machine-plane#image-management)information can be found here.

**Steps:**

1. Click Rebuild.
2. Select the image you wish to deploy.
3. The image will deploy in around 30 seconds.

<figure><img src="/files/8JDB8fg3mNZN7lkX5o9C" alt=""><figcaption><p>Computle Machine Re-Imaging</p></figcaption></figure>

***

## **Console access**

The VNC section provides access to the machine’s virtual console, allowing administrators to connect to the machine as if they were physically present in front of it.

**Steps:**

1. Click the **Enable VNC Access** button to activate VNC functionality.
2. A new window or link will be generated, allowing you to remotely view and control the machine.

***

## **Password reset**

**Reset Password**: This feature allows you to reset the administrator password for the machine.

**Steps:**

1. Click the **Reset Password** button.
2. A new temporary password will be emailed to you.


# Machine Assignment

{% hint style="info" %}
The **Computle Broker Agent** helps you manage machine assignments by dynamically updating based on the device's hostname and assigned user. For installation details, [head here.](/service-delivery/service-delivery-architecture/computle-broker)
{% endhint %}

## **To modify an assignment:**

1. **Open the Modify Assignments Window:**

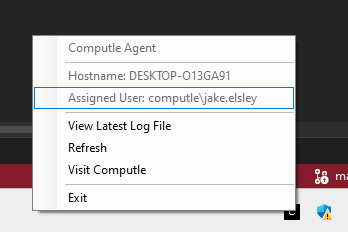
   * Right-click on the **Computle Broker Agent** icon in the system tray.

   <div align="left"><figure><img src="/files/WCAI8ZPmTr9BoEHm7eUe" alt=""><figcaption></figcaption></figure></div>

   * From the menu, select **Modify Assignments**.
2. **Update Assigned User:**

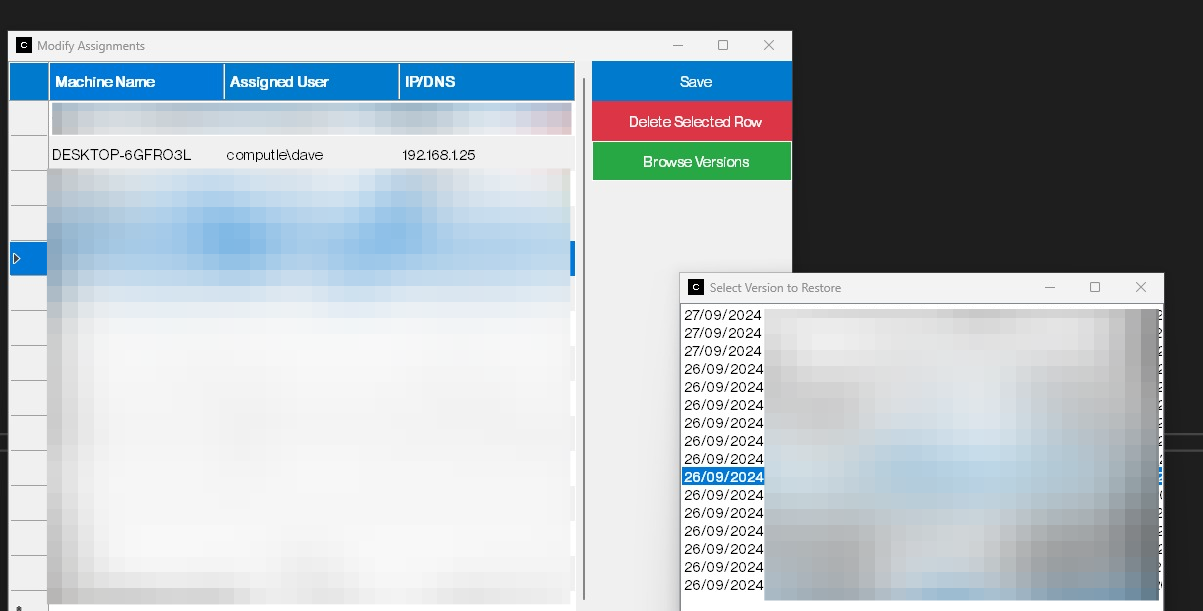
   * In the window, you will see a table with the columns for **Machine Name**, **Assigned User**, and **IP/DNS**.
   * To change the user, click the **Assigned User** field next to the machine you wish to update.
   * Enter the new user in the following format: `domain\username`

   <div align="left"><figure><img src="https://blog.computle.com/content/images/2024/09/image-1.png" alt=""><figcaption></figcaption></figure></div>
3. **Save Changes:**
   * After editing the user assignment, click the **Save** button on the right side of the window.
   * The new user assignment will now be synced.
4. **Sync Interval:**
   * The updated assignment is automatically synced every **5 minutes** to ensure that all machines and users are up to date. This means that after making a change, the new user assignment will take effect on the machine after the next sync cycle.

***

## **Restoring Previous Versions**

If you need to revert to an older assignment configuration, you can restore a previous version using the **Browse Versions** feature.

1. **Open the Modify Assignments Window:**
   * Right-click the **Computle Broker Agent** icon in the tray.
   * Select **Modify Assignments** from the menu.
2. **Browse Versions:**
   * In the **Modify Assignments** window, click the **Browse Versions** button on the right.
   * A new window will appear, listing historical versions of the assignment configurations by date.
3. **Select and Restore:**
   * Scroll through the list and choose the version you want to restore.
   * Select the desired date and confirm the restoration.
   * The machine assignments will now be reverted to how they were on that specific date.
4. **Save and Sync:**
   * After restoring a previous version, the updated assignment list will be automatically synced to the system within **5 minutes**.

***

## **Viewing Latest Log Files**

This feature allows administrators to access log files, which can be helpful for tracking changes or troubleshooting issues.

1. **Right-Click the Tray Icon:**
   * Right-click the **Computle Broker Agent** icon in the system tray.
2. **Select “View Latest Log File”:**
   * From the menu, click **View Latest Log File**.
   * This will open the most recent log file in your default text editor, displaying any recent activity, changes, or errors related to machine assignments.

***

## **Refreshing the Interface**

If you make changes or want to check for updates immediately, you can manually refresh the assignment interface.

1. **Right-Click the Tray Icon:**
   * Right-click the **Computle Broker Agent** icon.
2. **Select “Refresh”:**
   * Click **Refresh** from the menu.
   * This will reload the current machine assignments and ensure the latest data is displayed.


# Billing Portal

## Billing

You can access the Stripe billing portal [here](https://checkout.computle.com/p/login/6oEcOtdSkd4v2ha8ww).


# Service Status

## Status

You can access the Computle Status page [here](https://status.computle.com).


# Virtual Machine Licensing and User Identification Requirements (Windows 11 Professional)

## DISCLAIMER

THIS DOCUMENT IS FOR INFORMATIONAL PURPOSES ONLY AND REFLECTS THE AUTHOR’S INTERPRETATION OF LICENSING TERMS. IT DOES NOT CONSTITUTE LEGAL, FINANCIAL, OR PROFESSIONAL ADVICE. NO GUARANTEES, REPRESENTATIONS, OR WARRANTIES—EXPRESS OR IMPLIED—ARE MADE REGARDING THE ACCURACY, COMPLETENESS, OR RELIABILITY OF THE INFORMATION PROVIDED. THE AUTHOR AND PUBLISHER DISCLAIM ALL LIABILITY FOR ANY LOSS, DAMAGE, OR LEGAL CONSEQUENCES RESULTING FROM RELIANCE ON THIS CONTENT. FOR GUIDANCE SPECIFIC TO YOUR SITUATION, CONSULT A QUALIFIED LEGAL PROFESSIONAL.

## COMPUTLE TERMS OF SERVICE (n1)

· Section 2 grants you a non-exclusive, non-transferable license to use the Computle Software, including any applicable Third-Party Software, in accordance with these terms and conditions, including its termination provisions.

· "Third-Party Software" means all software owned by a third party, but legally licensed for distribution by Computle or as part of the Computle Software.

· Section 4 places a reporting obligation on the person/entity who is responsible for the leasing of the Computle Goods and Computle Software that if the Computle System is to be used by multiple users you must identify and name the number of users and their respective identities.

· Section 5 grants that you may at your own cost use the Computle Software temporarily on an alternative processor to the Computle System for the purpose of disaster recovery, which for clarity, includes physical access to your assigned workstations, where possible.

## COMPUTLE SERVICE ARCHITECTURE

· Computle Broker requires that a specific user be explicitly authorized to access a specific workstation, ensuring that only that designated person—and no one else—can access it.

· Our product keys are Windows 11 Professional OEM licenses installed onto dedicated virtualised workstations.

· Computle Devices run Windows 11 Professional OEM.

## MICROSOFT LICENSE TERMS WINDOWS OPERATING SYSTEM (n2)

· Section 2 (b) states “In this agreement, “device” means a local hardware system (whether physical or virtual) with an internal storage device capable of running the software. A hardware partition or blade is considered to be a device. For purposes of this agreement, “device” does not include any hardware system (whether physical or virtual) on which the software is installed or accessed solely for remote use over a network.”

· Section 2 (d) (iv) states “Use in a virtualized environment. This license allows you to install only one instance of the software for use on one device, whether that device is physical or virtual. If you want to use the software on more than one virtual device, you must obtain a separate license for each instance.”

· Section 2 (d) (v) adds “Remote access. No more than once every 90 days, you may designate a single user who physically uses the licensed device as the licensed user. The licensed user may access the licensed device from another device using remote access technologies for a period of up to 365 days from the last physical use. Other users, at different times, may access the licensed device from another device using remote access technologies, but only on devices separately licensed to run the same or higher edition of this software.”

## WINDOWS 11 LICENSING BRIEF FOR VIRTUAL DESKTOP

· Computle is a workstation manufacturer and not a Microsoft Commercial Licensing customer.

· The document states “This brief addresses Windows 11 licensing for Microsoft Commercial Licensing customers only. For the purposes of this brief, Commercial Licensing programs include all Volume License programs, CSP, and the Microsoft Customer Agreement”.

· It goes onto say “Windows 11 licensed solely through your OEM device generally does not include virtualization entitlements, with some exceptions. Please see your OEM license agreement for more details.”

## OUR INTERPRETATION

· Computle provides a Windows 11 Professional OEM license per workstation.

· Computle requires that each workstation be assigned to a named user. If they are not a named user on the device that they are connecting to, they are denied access through our software architecture.

· Computle Device runs Windows 11 Professional.

· Clients are permitted to perform disaster recovery operations, which grants them physical access to their workstations as needed.

**Based on our interpretation of Microsoft’s licensing terms:**

o The primary assigned user may access their designated workstation remotely for up to 365 days before requiring reassignment.

o The terms imply that the workstation can be reassigned to an administrator who physically uses it. Following this, another user may then remotely access the workstation from a separate device, provided that the device used to connect is individually licensed to run at the same or a higher edition of Windows. We interpret this to mean that a Windows 11 Pro Computle Device meets this requirement.

o After 90 days, the device may be reassigned to another user for a further 365 days.

## NOTE:

· We interpret this to only apply to Windows 11 Professional devices. Windows 11 Home, Macintosh, Linux or other operating systems would require a separate license.

· We interpret the VDA licensing to apply to scenario where you do not control the end-user’s connecting device, such as contractor devices, third parties, and user’s personal devices or non-Windows 11 Professional devices.

· Accessing other Microsoft technologies, such as Windows Server or Active Directory, would require a Client Access License (CAL).

SOURCES

[Computle Terms of Sale](https://computle.com/terms-of-sale)

[Microsoft Windows 11 OEM License Terms](https://www.microsoft.com/content/dam/microsoft/usetm/documents/windows/11/oem-\(pre-installed\)/UseTerms_OEM_Windows_11_English.pdf)

[Windows 11 licensing for Virtual Desktops](https://www.licensingschool.co.uk/wp-content/uploads/2022/11/Windows-11_licensing_for_Virtual_Desktops_VLBrief-Nov2022.pdf)


# Migrating to Computle

## Pre-Migration

{% hint style="success" %}
**Parsec / Teradici PCoIP**

As the sole UK reseller for NICE DCV, we are able to offer new customers **free** migration licenses for NICE DCV. Benefit from the rich range of capabilities, such as audio/visual calls and 4K support.
{% endhint %}

{% hint style="info" %}
**GPU Analyser**

To help customers identify their system usage, we recommend that you install Computle's [GPU Analyser](/onboarding/migrating-to-computle/gpu-analyser) ahead of the migration. This helps you accurately understand system usage and the best plans for your workloads.
{% endhint %}

***

## Moving to Computle

When transitioning to Computle, the three most important aspects of the move are:

1. **Data:** Ensuring all your valuable information is securely and completely transferred to our platform.
2. **IDAM (Identity & Access Management):** Seamlessly migrating your identity management systems to ensure smooth access and permissions post-migration.
3. **Image Build:** Recreating or developing a fresh machine image on Computle for future use.
4. **Hardware:** Whether you will use your own devices, or use [Computle Device](/onboarding/administrator-guide/computle-device).

***

## Shared Responsibilities <a href="#user-and-identity-management" id="user-and-identity-management"></a>

For more information, head [here](/service-delivery/service-operations/shared-responsibility-model).

{% hint style="info" %}
**Best Endeavor Assistance**

All services here are provided free, on a best-endeavours basis. Additional costs may apply if the services rendered are extensive or complex.
{% endhint %}

### **User and Identity Management** <a href="#user-and-identity-management" id="user-and-identity-management"></a>

**Computle:**

* Computle can host virtualized domain controllers on Hyper-V. There is no fee for this service.
* Computle can provide virtualized Windows Server X instances which can be provisioned by you or your technical support provider as a Domain Controller. There is no fee for this service.
* Each customer is provided with a self-service portal which allows them to reset the local administrator account on provisioned workstations.

**You or your technical support provider:**

* You or your technical support provider handle all aspects of user management, including account creation, access permissions, password resets, and identity management (Azure AD, Google Workspace, etc.).

### Servers and Storage <a href="#servers-and-storage" id="servers-and-storage"></a>

**Computle:**

* Computle can host virtualized storage systems, ensuring clients can access their storage and data from a localised environment.
* Computle can host [virtualized storage solutions](/service-delivery/service-delivery-architecture/storage-providers) like Panzura, or Computle Files.

**You or your technical support provider:**

* You or your technical support provider manage data residency, compliance, file management, data integrity, and other storage or caching solutions.

***

## Migration Routes

### Route 1: Non-Cooperative Move

In cases where the incumbent provider refuses to engage with us during the transition, we take the following approach:

1. **Data Migration:** We clone all your data and securely migrate it to our environment, ensuring no loss or corruption during the process.
2. **New Domain Controller (DC) / Azure AD Setup:** We create a new Domain Controller or Azure AD environment to ensure your organization remains fully functional and secure.
3. **Basic Image Build:** We construct a basic machine image for your needs.

### Route 2: Cooperative Move

If the incumbent provider allows for a smooth transition, we follow these steps:

1. **Domain Controller Migration (Single Site):** We migrate your Domain Controllers if they are part of a single site, ensuring continuity for your existing infrastructure. For companies with multiple locations, we provide a new, additional Windows Server X instance. This is then configured by **you or your technical support provide** configure. **Note that in all instances, we only support the importing of virtualised domain controllers.**
2. **Data Migration with Planning:** We work with the incumbent provider to plan **migration windows** that minimize downtime and disruption. For *traditional file shares*, this includes using **delta sync** techniques to transfer data in stages, ensuring that the final switch to Computle is seamless with the least possible interruption to your workflow. In the case of *managed storage solutions*, such as as *Panzura*, we deploy the virtualised image and work directly with Panzura to implement the service.
3. **Image Build:** We provide the tools necessary to create your first Computle Image. Note that we do not support importing existing images from the previous provider, unless they come in the form of a Windows Deployment Services (WDS) sequence.

***

## Recommendations for Single Site Customers

If this migration involves your only site, we strongly recommend migrating all your resources and keeping them local on the Computle side. This helps with ease of management and ensures the highest levels of performance and reliability for your systems.

***

## Linked Services: M365 and Beyond

While Computle exclusively provides **workstations**, we understand that many organizations rely on linked services such as Microsoft 365 (M365) for productivity, communication, and collaboration.

Though we do not manage or provision accounts, licenses, or other third-party services, our platform is fully compatible with these solutions. Our workstations are designed to seamlessly integrate with M365 and similar cloud-based services, allowing your team to continue working without interruption.

If your organization uses other third-party tools like OneDrive, Teams, or SharePoint, our workstations are built to support these services out of the box, ensuring that your employees can access the resources they need with no additional setup.


# GPU Analyser

<figure><img src="/files/iPhgwL7fiw1HAi2WvWeZ" alt=""><figcaption></figcaption></figure>

### Computle GPU Analyser is a powerful free tool designed to help organisations monitor and analyse GPU usage across their workstations. By providing detailed insights into how different users utilise GPU resources, it enables IT administrators to make informed decisions when planning a migration to Computle.

{% hint style="info" %}
Access the demo [**here**](https://gpuanalyser.computle.net/demo/)**.**
{% endhint %}

## Features

* **Real-Time GPU Monitoring**: Track GPU utilisation in real-time.
* **Historical Data Access**: View historical GPU performance data to spot trends over time.
* **System Information Collection**: Gather detailed system specs, including CPU, RAM, GPU type, and operating system.
* **Web-Based Dashboard**: Visualise GPU performance metrics through our intuitive web interface.
* **Customizable Time Ranges**: Analyse data over various time periods (e.g., past 24 hours, 7 days, 30 days).

***

## Windows agent

The GPU Analyser installs a lightweight agent on each workstation. This agent runs silently in the background, collecting GPU performance metrics at regular intervals without disrupting user activities.

The data collected includes:

#### GPU Performance Metrics

* **Timestamp**: Date and time of data capture.
* **GPU Utilization (%)**: Current usage level of the GPU.
* **Memory Used (MB)**: Amount of GPU memory in use.
* **Power Draw (W)**: Current power consumption of the GPU.

#### System Information

* **CPU**: Processor model and specifications.
* **RAM**: Total installed system memory.
* **GPU Type**: Make and model of the GPU.
* **GPU vRAM**: Total video memory available on the GPU.
* **Operating System**: Version and build of the operating system.

***

## Installation

#### Prerequisites

* **Administrator Access**: Required for installation on each workstation.
* **Internet Connection**: Necessary for data uploads to Computle's servers.

#### Unattended Installation

PowerShell

```
# Computle GPU Analyser Silent Installation Script

# Product Key
$productKey = "PUT_YOUR_KEY_HERE"

if (-not $productKey) {
    exit 1
}

$installerUrl = "https://gpuanalyser.computle.net/installer/Computle_GPU_Analyser_x64_2024.09.01.5.exe"
$installerPath = "$env:TEMP\Computle_GPU_Analyser_x64_2024.09.01.5.exe"

Invoke-WebRequest -Uri $installerUrl -OutFile $installerPath

if (-not (Test-Path $installerPath)) {
    exit 1
}

Start-Process -FilePath $installerPath -ArgumentList "/S", "/ProductKey=$productKey" -Wait

```

3. Reboot the machine.
4. Verify the data on the web dashboard:

{% hint style="info" %}
[Web dashboard](https://gpuanalyser.computle.net)
{% endhint %}

***

**MSI**

1. **Download the Installer**:

{% hint style="info" %}
**Installer:** [Computle\_GPU\_Analyser\_x64\_2024.09.01.5.exe](https://gpuanalyser.computle.net/installer/Computle_GPU_Analyser_x64_2024.09.01.5.exe)

**sha256sum** 4396d5e4cdfb05c1572cbc4ae8e5e239fc50028f4484a27017b429487365ed08
{% endhint %}

2. Deploy the MSI with the following arguments:

`Computle_GPU_Analyser_x64_2024.09.01.5.exe /S /ProductKey=KEY`

3. Reboot the machine.
4. Verify the data on the web dashboard:

{% hint style="info" %}
[Web dashboard](https://gpuanalyser.computle.net)
{% endhint %}

***

#### Manual Installation

1. **Download the Installer**:

{% hint style="info" %}
**Installer:** [Computle\_GPU\_Analyser\_x64\_2024.09.01.5.exe](https://gpuanalyser.computle.net/installer/Computle_GPU_Analyser_x64_2024.09.01.5.exe)

**sha256sum** 4396d5e4cdfb05c1572cbc4ae8e5e239fc50028f4484a27017b429487365ed08
{% endhint %}

2. **Run the Installer**:

* Double-click the installer file.
* Follow the on-screen prompts.

<figure><img src="/files/0luidxU7FLIlZLozxgau" alt=""><figcaption></figcaption></figure>

<figure><img src="/files/Bnm9jyLgGGnkEbaPUfeG" alt=""><figcaption></figcaption></figure>

<figure><img src="/files/J1BihBsX6PiGSQUCu7FJ" alt=""><figcaption></figcaption></figure>

3. **Completion**

The agent will start running in the background upon successful installation. After closing the window, you can view the live results in the web dashboard.

<figure><img src="/files/FkGNBpudIgbcOc6Az3Y4" alt=""><figcaption></figcaption></figure>

***

## Using the web dashboard

Access the web dashboard and enter your serial:

{% hint style="info" %}
[Web dashboard](https://gpuanalyser.computle.net)
{% endhint %}

<figure><img src="/files/DMeHlZEeUvRvTVEA292Z" alt=""><figcaption><p>Computle GPU Analyser</p></figcaption></figure>

***

## Using the dashboard

1. **Machine Selection**:
   * Use the **"Select Machine"** dropdown to choose a workstation.
2. **Time Range Selection**:
   * Choose from predefined time ranges (e.g., past 24 hours, 7 days, 30 days) or set a custom range.
3. **Viewing Charts**:
   * **GPU Utilization Chart**: Visual representation of GPU usage over time.
   * **Memory Usage Chart**: Displays GPU memory consumption patterns.
   * **Power Draw Chart**: Shows the GPU's power consumption trends.
4. **System Information**:
   * Access detailed hardware and system specs for the selected machine.

<figure><img src="/files/iPhgwL7fiw1HAi2WvWeZ" alt=""><figcaption></figcaption></figure>

***

## Troubleshooting

* **No Data Displayed**:
  * Ensure the agent is running on the workstation. You can verify this by going to Services and then looking for *Computle GPU Analyser*. Ensure that the status shows as Running.
  * Verify that the machine has an active internet connection.
  * Check firewall settings to allow outbound connections to Computle's servers. `gpuanalyser.computle.net`
* **Agent Not Starting**:
  * Confirm that the installation was completed with administrator privileges.
  * Reinstall the agent if necessary.
* **Incorrect System Information**:
  * The agent collects system info daily; discrepancies may resolve after 24 hours.
  * Ensure the workstation's date and time settings are correct.
* Log file
  * Logs are stored in `C:\ProgramData\GPUAnalyser\logs`.

***

## FAQs

* **Is the GPU Analyser resource-intensive?** No, the agent is designed to be lightweight and operates with minimal impact on system performance.
* **How often is data collected?** Data is collected every second and then aggregated into hourly averages.
* **Do I need to remain logged in?** No, the application runs as a service.


# Streaming Agent


# NICE DCV


# Unable To Connect

**Network requirements**

* You must be able to access port 8443.
* You must be able to access *\*.computle.net* and *\*.computle.com.*

If you use security solutions such as Zscaler, please ensure that you whitelist these domains.

**PowerShell**

To test connectivity, you can run the following PowerShell command, replacing "machine.computle.net" with your machine ID:

`Test-NetConnection -ComputerName machine.computle.net -Port 8443`

**Web browser**

On instances where the web client is enabled, you can navigate to the following webpage, replacing "machine.computle.net" with your machine ID. This will present a NICE DCV connection screen.

`https://machine.computle.net:8443`


# Unable To Login

**Local Administrator**

To use the local Administrator account, you can reset the password via Portal > Machine > Options > Administrator Password > Reset Password

***

**EntraID/AzureAD**

Pure EntraID/AzureAD joined machines should use `AzureAD\Your@Email.com.`

You can workaround this by using Computle Device, or by creating a shortcut that parses the AzureAD prefix.

***

**On-Premise Active Directory**

For on-premise Active Directory, you should use `DOMAIN\Username`.

***

**Connect Button Inactive**

If you get an error where DCV does not connect, please install the latest [Microsoft Visual C++ Redistributable](https://aka.ms/vs/17/release/vc_redist.x64.exe).

Alternatively, you can use the web client, but note that performance will be reduced.

***

**No Session Available**

Please ensure the [License Server](/troubleshooting/streaming-agent/nice-dcv/dcv-server-license-warning) details are set and that a user is assigned in `HKEY_USERS\S-1-5-18\Software\GSettings\com\nicesoftware\dcv\session-management\automatic-console-session`.

{% hint style="danger" %}
DCV 2025 was released 22nd October 2025, with all Computle users running DCV 2024. Certain IT management platforms may identify this new version and automatically deploy it. Doing so results in “no session available” errors, blocking sign-in. This is caused by an unavailability of licensing for this specific release, which will be rectified when this version is production ready. Please do not upgrade unless specifically requested to do so. DCV has no automatic update mechanism, therefore, most users should not be impacted. However, if impacted, you must rollback to the production stable release, DCV 2024. Read more dcv[Reinstall DCV Server](/troubleshooting/component-reinstallation/reinstall-dcv-server).
{% endhint %}


# DCV Server Certificate Warning

1. As an Administrator, launch PowerShell ISE.
2. Paste the following code into the PowerShell script pane.

```sh
$sourceKey = "https://certs.computle.net/dcv.key"
$sourcePem = "https://certs.computle.net/dcv.pem"
$destinationFolder = "C:\Windows\System32\config\systemprofile\AppData\Local\NICE\dcv\"

# Ensure destination folder exists
if (-not (Test-Path -Path $destinationFolder)) {
    New-Item -ItemType Directory -Path $destinationFolder -Force
    Write-Output "Created destination folder: $destinationFolder"
}

# Download certificates immediately with error handling
Write-Output "Downloading certificates..."

try {
    Invoke-WebRequest -Uri $sourceKey -OutFile "$destinationFolder\dcv.key" -UseBasicParsing -ErrorAction Stop
    Write-Output "Successfully downloaded dcv.key"
} catch {
    Write-Error "Failed to download dcv.key: $_"
}

try {
    Invoke-WebRequest -Uri $sourcePem -OutFile "$destinationFolder\dcv.pem" -UseBasicParsing -ErrorAction Stop
    Write-Output "Successfully downloaded dcv.pem"
} catch {
    Write-Error "Failed to download dcv.pem: $_"
}

# Create scheduled task for daily certificate updates
Write-Output "Creating scheduled task for daily certificate updates..."

$script = @"
if (-not (Test-Path -Path '$destinationFolder')) {
    New-Item -ItemType Directory -Path '$destinationFolder' -Force
}
try {
    Invoke-WebRequest -Uri '$sourceKey' -OutFile '$destinationFolder\dcv.key' -UseBasicParsing -ErrorAction Stop
} catch {
    Write-EventLog -LogName Application -Source 'DCV Cert Update' -EventId 1001 -EntryType Error -Message "Failed to download dcv.key: `$_"
}
try {
    Invoke-WebRequest -Uri '$sourcePem' -OutFile '$destinationFolder\dcv.pem' -UseBasicParsing -ErrorAction Stop
} catch {
    Write-EventLog -LogName Application -Source 'DCV Cert Update' -EventId 1002 -EntryType Error -Message "Failed to download dcv.pem: `$_"
}
"@

$action = New-ScheduledTaskAction -Execute "PowerShell.exe" -Argument "-NoProfile -ExecutionPolicy Bypass -Command `"$script`""
$trigger = New-ScheduledTaskTrigger -Daily -At 3am
$settings = New-ScheduledTaskSettingsSet -AllowStartIfOnBatteries -DontStopIfGoingOnBatteries

try {
    Register-ScheduledTask -TaskName "Update DCV Certs" -Action $action -Trigger $trigger -Settings $settings -RunLevel Highest -User "SYSTEM" -ErrorAction Stop
    Write-Output "Successfully created scheduled task 'Update DCV Certs'"
} catch {
    Write-Error "Failed to create scheduled task: $_"
}

```

3. Click Run or F5 to start the process.


# DCV Server License Warning

Some network security devices can interfere with Computle Licensing. Common issues include DNS resolution and port blocking. By default, Computle Licensing is checked every five minutes.

***

**Network Resolution**

Ensure that Computle Machine can resolve the following DNS records:

```
dcvlicensing1.computle.net
dcvlicensing2.computle.net
```

***

**Overwrite DNS Records with IPs**

If the DNS resolution is working as expected, and you are unable to obtain a license, you can modify the registry entries to use direct IPs instead.

1. As an Administrator, launch PowerShell ISE.
2. Paste the following code into the PowerShell script pane.

```sh
$licensingServers = @(
    'dcvlicensing1.computle.net',
    'dcvlicensing2.computle.net'
)

$resolvedIPs = @()

foreach ($server in $licensingServers) {
    try {
        $ipAddresses = [System.Net.Dns]::GetHostAddresses($server)
        foreach ($ip in $ipAddresses) {
            $resolvedIPs += "5053@$($ip.IPAddressToString)"
        }
    } catch {
        Write-Host "Failed to resolve $server" -ForegroundColor Red
    }
}

$licenseValue = $resolvedIPs -join ';'

$registryPath = 'Registry::HKEY_USERS\S-1-5-18\Software\GSettings\com\nicesoftware\dcv\license'
$registryKey = 'license-file'

New-ItemProperty -LiteralPath $registryPath -Name $registryKey -Value $licenseValue -PropertyType String -Force -ErrorAction SilentlyContinue

Write-Host "Registry updated successfully with license value: $licenseValue" -ForegroundColor Green
```

3. Click Run or F5 to start the process.


# USB Passthrough

1. Connect the USB device in any open USB slot on your computer.
2. Go to your DCV client session.
3. Choose the Settings icon located in the upper left of the window.

   ![](https://docs.aws.amazon.com/images/dcv/latest/userguide/images/dcv-settings-icon.jpg)
4. Select Removable Devices... from the dropdown menu.

   ![](https://docs.aws.amazon.com/images/dcv/latest/userguide/images/dcv-settings-dropdown.jpg)
5. Move the slider next to the USB device in the list.

   ![](https://docs.aws.amazon.com/images/dcv/latest/userguide/images/dcv-settings-removable-devices.png)

Your USB device is ready to use now.

***

## Specialised Devices

Computle uses an allow list to determine which USB devices clients are allowed to use. By default, some commonly used USB devices are added to the allow list. This means clients can connect these USB devices to their computer and use them on the server without any additional configuration.

However, some specialized devices might not be added to the allow list by default. These devices must be manually added to the allow list on the NICE DCV server before they can be used by the client. After they have been added, they appear in the Windows client Settings menu.

### **To add a USB device to the allow list**

1. Install the USB device's hardware drivers on the Computle Machine.
2. On the Windows client machine, navigate to `C:\Program Files (x86)\NICE\DCV\Client\bin\` in the File Manager.
3. Run `dcvusblist.exe`.
4. Right-click on the USB device in the list.
5. Choose Copy filter string from the dropdown menu.
6. On the Computle Machine, open `C:\Program Files\NICE\DCV\Server\conf\usb-devices.conf` using your preferred text editor and add the filter string to a new line at the bottom of the file.
7. Save and close the file.
8. Open the Services snap-in for the Microsoft Management Console.
9. In the right pane, open DCV Server.
10. Click Stop.
11. Click Start.


# WebAuthn Redirection/FIDO Keys

WebAuthn redirection requires a **browser extension** to be installed on the Computle Machine. When the feature is enabled and the browser extension is installed, any WebAuthn requests initiated by the web applications running in the browser within the session are seamlessly redirected to the local client. Users can then use utilize devices like Windows Hello or YubiKey to finalize the authentication.

### Automatic Prompt on First Browser Launch

Users are prompted to enable the DCV browser extension when they first launch their browser. If they choose not to install the extension or uninstall it later, WebAuthn redirection will not work. An administrator can enforce installation using the Group Policy.

### Installing Using the Group Policy <a href="#w16aac16c51c19b5" id="w16aac16c51c19b5"></a>

For organizations looking to deploy the extension on a broader scale, you can utilize the Group Policy.

**Using Microsoft Edge:**

1. Download and install the [Microsoft Edge administrative template.](https://learn.microsoft.com/en-us/deployedge/configure-microsoft-edge#1-download-and-install-the-microsoft-edge-administrative-template)
2. Launch the Group Policy Management tool (gpmc.msc).
3. Navigate through: Forest > Domains > Your FQDN (e.g., example.com) > Group Policy Objects.
4. Select desired policy or create a new one then right-click on it and select "Edit".
5. Follow this path: Computer Configuration > Administrative Templates > Microsoft Edge > Extensions.
6. Access "Configure extension management settings", set it to "Enabled".
7. In the field for Configure extension management settings, enter the following:

   ```
   {"ihejeaahjpbegmaaegiikmlphghlfmeh":{"installation_mode":"force_installed","update_url":"https://edge.microsoft.com/extensionwebstorebase/v1/crx"}}
   ```
8. Save the changes and reboot the server.

**Using Google Chrome:**

1. Obtain and implement the [Google Chrome administrative template](https://chromeenterprise.google/browser/download/#manage-policies-tab)
2. Similar to the steps for Microsoft Edge, navigate through the Group Policy Management tool.
3. Proceed to: Computer Configuration > Administrative Templates > Google Chrome > Extensions.
4. Access "Configure extension management settings", set it to "Enabled".
5. In the field for Configure extension management settings, enter the following:

   ```
   {"mmiioagbgnbojdbcjoddlefhmcocfpmn":{ "installation_mode":"force_installed","update_url":"https://clients2.google.com/service/update2/crx"}}
   ```
6. Save the changes and reboot the server.

### Installing Manually <a href="#manual-install" id="manual-install"></a>

Extensions can be sourced from the respective browser stores:

* [Microsoft Edge Add-ons](https://microsoftedge.microsoft.com/addons/detail/dcv-webauthn-redirection-/ihejeaahjpbegmaaegiikmlphghlfmeh)
* [Chrome Web Store](https://chrome.google.com/webstore/detail/dcv-webauthn-redirection/mmiioagbgnbojdbcjoddlefhmcocfpmn)

For manual installation:

1. Connect to your NICE DCV session.
2. Open your preferred browser, and navigate to the relevant browser store (links above).
3. Proceed by selecting "Get" (Microsoft Edge) or "Add to Chrome" (Google Chrome).
4. Follow the on-screen instructions. A confirmation will appear once the extension is successfully added.

\\

\\


# Resolution and Quality

## TCP/QUIC-UDP

By default, Computle uses TCP mode to transport display pixels.

You can see which mode you are using by clicking the *Cog > Streaming Mode* and then checking for TCP/WebSocket mode, or QUIC mode.

<figure><img src="/files/Ctd2jYKUYTk8b1lJz11w" alt=""><figcaption></figcaption></figure>

On connections with a latency of above 50ms, we recommend enabling UDP/QUIC mode. However, if you core switches and routers do not support Jumbo Frames, this may have a determinantal effect on performance.

**To enable UDP/QUIC mode:**

* Open Regedit
* Go to “HKEY\_USERS/S-1-5-18/Software/GSettings/com/nicesoftware/dcv/connectivity”
* Double click “enable-quic-frontend” and change value to 1.
* Reboot Computle.
* Within the DCV application, selected QUIC.

***

## Low-Frame Rate

On Computle supplied images, the default framerate is set to 60fps.

This is managed via the target-fps key under:

`HKEY_USERS/S-1-5-18/Software/GSettings/com/nicesoftware/dcv/display`

If this value is missing, you can recreate it with the following PowerShell command:

```
$RegistryPath = "HKU\S-1-5-18\Software\GSettings\com\nicesoftware\dcv\display"
$Name = "target-fps"
$Value = 60

if (-not (Test-Path $RegistryPath)) {
    New-Item -Path $RegistryPath -Force
}

Set-ItemProperty -Path $RegistryPath -Name $Name -Value $Value
```

***

## Resolution

**Default**

Computle supports quad-4K displays by default with a maximum resolution of 4096\*4096 per monitor.

**Ultra-Wide Support (5120x1440)**

Ultra-wide monitor users may be required to amend their display configuration if they are unable to enter full screen mode. To do so, run the following commands from an elevated Command Prompt.

1. Set `enable-client-resize` to 0:

```
dcv set-config-param --session session-id enable-client-resize=0
```

2. Set a custom layout for the current session:

```
dcv set-display-layout --session session-id 2560x1440+0+0,2560x1440+2560+0
```

3. Disconnect from Computle.
4. Connect to the session, switch to full screen, and check if the layout is correct.
5. If the layout is satisfactory, make it permanent:

```
dcv set-config-param --session session-id console-session-default-layout=2560x1440+0+0,2560x1440+2560+0
```


# No Username or Password Requested

If you get an error where it does not ask for the username or password, please install the latest [Microsoft Visual C++ Redistributable](https://aka.ms/vs/17/release/vc_redist.x64.exe).

Alternatively, you can use the web client, but note that performance will be reduced.


# DCV Idle Timeout Reached

To change the NICE DCV server's idle timeout period, you must configure the `idle-timeout` parameter using the Windows Registry Editor.

**To change the idle timeout period on Windows**

1. Open the Windows Registry Editor.
2. Navigate to the HKEY\_USERS\S-1-5-18\Software\GSettings\com\nicesoftware\dcv\connectivity\ key and select the idle-timeout parameter.

   If the parameter can't be found, use the following steps to create it:

   1. In the navigation pane, open the context (right-click) menu for the connectivity key. Then, choose New, DWORD (32-bit) value.
   2. For Name, enter `idle-timeout` and press Enter.
3. Open the idle-timeout parameter. For Value data, enter a value for the idle timeout period (in minutes, decimal). To avoid disconnecting idle clients, enter `0`.
4. Choose OK and close the Windows Registry Editor.


# Allow Any User to Connect

### Version 2 Machines

```
# Updates NICE DCV default.perm to allow any user to connect

$permFile = "C:\Program Files\NICE\DCV\Server\conf\default.perm"

$content = @"
[permissions]
%any% allow builtin
"@

Set-Content -Path $permFile -Value $content -Force

Write-Host "Updated $permFile with '%any% allow builtin'"

# Restart DCV Server service
Restart-Service -Name "dcvserver" -Force
Write-Host "DCV Server restarted"
```

### Version 3 Machines

Follow [this](/computle-client/computle-client-migration-guide-v3.0.8) migration guide.


# Mechdyne TGX


# Enable USB Redirection

This guide explains how to enable USB redirection on Compute workstations using Mechdyne TGX.

### Automated Setup

For easier deployment, use the PowerShell script below to automatically configure USB redirection.

#### Prerequisites

* Run PowerShell as Administrator
* Ensure TGX is installed on the workstation

{% hint style="info" %}
**To enable script execution, run:**

Set-ExecutionPolicy RemoteSigned -Scope CurrentUser
{% endhint %}

#### Usage

1. Copy the setup script
2. Open PowerShell ISE as Administrator
3. Paste the script into the white window
4. Click the green run button, or press the F5 key

```powershell
param([switch]$Force)

Write-Host "Computle Workstation TGX USB Redirection Setup" -ForegroundColor Green

if (-NOT ([Security.Principal.WindowsPrincipal] [Security.Principal.WindowsIdentity]::GetCurrent()).IsInRole([Security.Principal.WindowsBuiltInRole] "Administrator")) {
    Write-Error "This script must be run as Administrator."
    exit 1
}

$configPath = "C:\ProgramData\Mechdyne\TGX\usbConfig.ini"
$backupPath = "$configPath.backup"

if (!(Test-Path "C:\ProgramData\Mechdyne\TGX")) {
    Write-Error "TGX installation directory not found on this Computle workstation."
    exit 1
}

if (Test-Path $configPath) {
    if (!$Force) {
        $backup = Read-Host "Create backup? (y/n)"
        if ($backup -eq 'y' -or $backup -eq 'Y') {
            Copy-Item $configPath $backupPath
        }
    } else {
        Copy-Item $configPath $backupPath
    }
}

$configContent = @"
[Class]
Unspecified=true
Audio=true
Communications=true
Hid=true
Pid=true
Image=true
Printer=true
MassStorage=true
Hub=true
CdcData=true
SmartCard=true
Security=true
Video=true
Phdc=true
Av=true
Billboard=true
UsbCBridge=true
Diagnostic=true
Wireless=true
Miscellaneous=true
Application=true
Vendor=true
[Whitelist]
[Blacklist]
"@

$configContent | Out-File -FilePath $configPath -Encoding ASCII

$tgxServices = Get-Service | Where-Object { $_.Name -like "*TGX*" -or $_.DisplayName -like "*TGX*" }
if ($tgxServices) {
    foreach ($service in $tgxServices) {
        Restart-Service $service.Name -Force
    }
}

Write-Host "Computle workstation USB redirection setup completed successfully!" -ForegroundColor Green

if (!$Force) {
    $reboot = Read-Host "Restart computer now to complete setup? (y/n)"
    if ($reboot -eq 'y' -or $reboot -eq 'Y') {
        Restart-Computer -Force
    } else {
        Write-Host "Please restart your computer manually to complete the USB redirection setup." -ForegroundColor Yellow
    }
} else {
    Write-Host "Setup complete. Please restart your computer manually to complete the USB redirection setup." -ForegroundColor Yellow
}
```

***

### Manual Configuration

#### Step 1: Open Configuration File

Open PowerShell as Administrator and edit the USB configuration file:

```powershell
notepad C:\ProgramData\Mechdyne\TGX\usbConfig.ini
```

#### Step 2: Configure USB Classes

Replace the contents with the following configuration to enable all USB device classes:

```ini
[Class]
Unspecified=true
Audio=true
Communications=true
Hid=true
Pid=true
Image=true
Printer=true
MassStorage=true
Hub=true
CdcData=true
SmartCard=true
Security=true
Video=true
Phdc=true
Av=true
Billboard=true
UsbCBridge=true
Diagnostic=true
Wireless=true
Miscellaneous=true
Application=true
Vendor=true

[Whitelist]

[Blacklist]
```

#### Step 3: Save and Restart

1. Save the file.
2. Restart your Computle workstation.

***

###


# Enable Microphone Input

This guide explains how to enable microphone redirection on Computle workstations using Mechdyne TGX and the Teradici Virtual Audio Driver.

### Automated Setup

#### Prerequisites

* Run PowerShell as Administrator
* Ensure TGX is installed on the workstation

{% hint style="info" %}
**To enable script execution, run:**

Set-ExecutionPolicy RemoteSigned -Scope CurrentUser
{% endhint %}

#### Usage

1. Copy the setup script
2. Open PowerShell ISE as Administrator
3. Paste the script into the white window
4. Click the green run button, or press the F5 key

```powershell
param(
    [switch]$Force,
    [string]$DownloadPath = "$env:TEMP\ComputleAudio"
)

Write-Host "Computle Workstation TGX Microphone Redirection Setup" -ForegroundColor Green

if (-NOT ([Security.Principal.WindowsPrincipal] [Security.Principal.WindowsIdentity]::GetCurrent()).IsInRole([Security.Principal.WindowsBuiltInRole] "Administrator")) {
    Write-Error "This script must be run as Administrator."
    exit 1
}

$downloadUrl = "https://downloads.oncomputle.com/virtual-audio-driver.exe"
$exeFile = "$DownloadPath\virtual-audio-driver.exe"

if (!(Test-Path $DownloadPath)) {
    New-Item -ItemType Directory -Path $DownloadPath -Force | Out-Null
}

Invoke-WebRequest -Uri $downloadUrl -OutFile $exeFile -UseBasicParsing

$installProcess = Start-Process -FilePath $exeFile -ArgumentList "/S" -Wait -PassThru

if ($installProcess.ExitCode -ne 0 -and $installProcess.ExitCode -ne 3010) {
    Write-Error "Installation failed on this Computle workstation with exit code: $($installProcess.ExitCode)"
    exit 1
}

Remove-Item $DownloadPath -Recurse -Force

if (!$Force) {
    Write-Host "Computle workstation microphone redirection setup completed successfully!" -ForegroundColor Green
    $reboot = Read-Host "Restart computer? (y/n)"
    if ($reboot -eq 'y' -or $reboot -eq 'Y') {
        Restart-Computer -Force
    }
}
```


# Component Reinstallation


# Reinstall DCV Server

**Prerequisite**

Ensure that Remote Desktop is enabled and that you can connect to the machine.

{% hint style="info" %}
Enable Remote Desktop by navigating to Settings > Remote Desktop Settings
{% endhint %}

***

**Refresh DCV Server**

1. Via Remote Desktop, connect to your Computle machine.
2. Search for **PowerShell ISE**; right click and select *Run as Administrator.*
3. Paste the following code into the PowerShell script pane and click **F5**.

```mathml
# Copyright Computle.com - Computle Reinstall DCV Server


$fileUrl = "https://d1uj6qtbmh3dt5.cloudfront.net/2024.0/Servers/nice-dcv-server-x64-Release-2024.0-19030.msi"
$savePath = "C:\Windows\Computle"
$installLogFile = "dcv_install_msi.log"

if (-not (Test-Path -Path $savePath)) {
    New-Item -ItemType Directory -Path $savePath -Force
}

Invoke-WebRequest -Uri $fileUrl -OutFile "$savePath\nice-dcv-server-x64-Release.msi"

$msiFile = Join-Path -Path $savePath -ChildPath "nice-dcv-server-x64-Release.msi"
Start-Process msiexec.exe -ArgumentList "/i `"$msiFile`" ADDLOCAL=ALL /quiet /norestart /l*v `"$installLogFile`"" -Wait

if(!(Test-Path -LiteralPath "Registry::\HKEY_USERS\S-1-5-18\Software\GSettings\com\nicesoftware\dcv\license")) {  
    New-Item "Registry::\HKEY_USERS\S-1-5-18\Software\GSettings\com\nicesoftware\dcv\license" -Force -ErrorAction SilentlyContinue 
}

if(!(Test-Path -LiteralPath "Registry::\HKEY_USERS\S-1-5-18\Software\GSettings\com\nicesoftware\dcv\connectivity")) {  
    New-Item "Registry::\HKEY_USERS\S-1-5-18\Software\GSettings\com\nicesoftware\dcv\connectivity" -Force -ErrorAction SilentlyContinue 
}

if(!(Test-Path -LiteralPath "Registry::\HKEY_USERS\S-1-5-18\Software\GSettings\com\nicesoftware\dcv\session-management\automatic-console-session")) {  
    New-Item "Registry::\HKEY_USERS\S-1-5-18\Software\GSettings\com\nicesoftware\dcv\session-management\automatic-console-session" -Force -ErrorAction SilentlyContinue 
}

New-ItemProperty -LiteralPath 'Registry::\HKEY_USERS\S-1-5-18\Software\GSettings\com\nicesoftware\dcv\license' -Name 'license-file' -Value '5053@dcvlicensing1.computle.net;5053@dcvlicensing2.computle.net' -PropertyType String -Force -ErrorAction SilentlyContinue
New-ItemProperty -LiteralPath 'Registry::\HKEY_USERS\S-1-5-18\Software\GSettings\com\nicesoftware\dcv\connectivity' -Name 'enable-quic-frontend' -Value 0 -PropertyType DWord -Force -ErrorAction SilentlyContinue
New-ItemProperty -LiteralPath 'Registry::\HKEY_USERS\S-1-5-18\Software\GSettings\com\nicesoftware\dcv\session-management\automatic-console-session' -Name 'owner' -Value 'computle' -PropertyType String -Force -ErrorAction SilentlyContinue
New-ItemProperty -Path 'Registry::\HKEY_USERS\S-1-5-18\Software\GSettings\com\nicesoftware\dcv\connectivity' -Name 'idle-timeout' -Value 0 -PropertyType DWord -Force -ErrorAction
New-ItemProperty -Path "HKLM:\Software\GSettings\com\nicesoftware\dcv\security" -Name "os-auto-lock" -PropertyType DWord -Value 1 -Force -ErrorAction SilentlyContinue

$sourceKey = "https://certs.computle.net/dcv.key"
$sourcePem = "https://certs.computle.net/dcv.pem"
$destinationFolder = "C:\Windows\System32\config\systemprofile\AppData\Local\NICE\dcv\"

if (-not (Test-Path -Path $destinationFolder)) {
    New-Item -ItemType Directory -Path $destinationFolder -Force
}

try {
    Invoke-WebRequest -Uri $sourceKey -OutFile "$destinationFolder\dcv.key" -UseBasicParsing -ErrorAction Stop
    Write-Output "Successfully downloaded dcv.key"
} catch {
    Write-Error "Failed to download dcv.key: $_"
}

try {
    Invoke-WebRequest -Uri $sourcePem -OutFile "$destinationFolder\dcv.pem" -UseBasicParsing -ErrorAction Stop
    Write-Output "Successfully downloaded dcv.pem"
} catch {
    Write-Error "Failed to download dcv.pem: $_"
}

$licensingServers = @(
    'dcvlicensing1.computle.net',
    'dcvlicensing2.computle.net'
)

$resolvedIPs = @()

foreach ($server in $licensingServers) {
    try {
        $ipAddresses = [System.Net.Dns]::GetHostAddresses($server)
        foreach ($ip in $ipAddresses) {
            $resolvedIPs += "5053@$($ip.IPAddressToString)"
        }
    } catch {
        Write-Host "Failed to resolve $server" -ForegroundColor Red
    }
}

$licenseValue = $resolvedIPs -join ';'

$registryPath = 'Registry::HKEY_USERS\S-1-5-18\Software\GSettings\com\nicesoftware\dcv\license'
$registryKey = 'license-file'

New-ItemProperty -LiteralPath $registryPath -Name $registryKey -Value $licenseValue -PropertyType String -Force -ErrorAction SilentlyContinue

Write-Host "Registry updated successfully with license value: $licenseValue" -ForegroundColor Green

Write-Host "Configuring Computle DCV permissions..." -ForegroundColor Yellow

$permissionsFilePath = "C:\Program Files\NICE\DCV\Server\conf\default.perm"

if (Test-Path $permissionsFilePath) {
    $backupPath = "$permissionsFilePath.backup.$(Get-Date -Format 'yyyyMMdd_HHmmss')"
    try {
        Copy-Item $permissionsFilePath $backupPath -Force
        Write-Host "Permissions backup created: $backupPath" -ForegroundColor Green
    }
    catch {
        Write-Warning "Failed to create permissions backup: $_"
    }

    try {
        $content = Get-Content $permissionsFilePath -Raw
        $content = $content -replace '(?m)^; %owner% allow builtin', '%any% allow builtin'
        Set-Content -Path $permissionsFilePath -Value $content -Encoding ASCII -NoNewline
        Write-Host "Successfully updated Computle DCV permissions to allow owner" -ForegroundColor Green
    }
    catch {
        Write-Warning "Failed to update permissions file: $_"
    }
} else {
    Write-Warning "Computle DCV permissions file not found at: $permissionsFilePath"
}

Clear-Host

Write-Host "Installation complete!" -ForegroundColor Green
Write-Host "Computle DCV Server has been installed and configured with:" -ForegroundColor Cyan
Write-Host "- License servers configured" -ForegroundColor White
Write-Host "- SSL certificates downloaded" -ForegroundColor White
Write-Host "- Permissions set to allow owner (%owner%) to connect" -ForegroundColor White

Write-Host "`nSetting DCV Server to Automatic (Delayed Start)..." -ForegroundColor Yellow
try {
    Set-Service -Name dcvserver -StartupType "Automatic" -ErrorAction Stop
    sc.exe config dcvserver start= delayed-auto
    Write-Host "DCV Server startup type set to Automatic (Delayed Start)" -ForegroundColor Green
} catch {
    Write-Warning "Failed to set DCV Server startup type: $_"
}

Write-Host "`nFinal step: Restarting Computle DCV Server service..." -ForegroundColor Yellow
try {
    Restart-Service -Name dcvserver -Force -ErrorAction Stop
    Write-Host "Computle DCV Server service restarted successfully!" -ForegroundColor Green
} catch {
    Write-Warning "Failed to restart Computle DCV Server service: $_"
    Write-Host "Please manually restart the service using: Restart-Service dcvserver" -ForegroundColor Yellow
}

Write-Host "`nComputle DCV Server setup is now complete and ready for connections!" -ForegroundColor Green


```


# Reinstall NVIDIA

**Prerequisite**

Ensure that Remote Desktop is enabled and that you can connect to the machine.

{% hint style="info" %}
Enable Remote Desktop by navigating to Settings > Remote Desktop Settings
{% endhint %}

***

**Refresh NVIDIA**

{% hint style="info" %}
This script installs NVIDIA RTX Driver Release 550 R550 U8 (552.86). This is the latest version as of August 1st 2024.
{% endhint %}

1. VIa Remote Desktop, connect to your Computle machine.
2. As an Administrator, launch PowerShell ISE.
3. Paste the following code into the PowerShell script pane.

```sh
$nvidiaFileUrl = "https://uk.download.nvidia.com/Windows/Quadro_Certified/552.86/552.86-quadro-rtx-desktop-notebook-win10-win11-64bit-international-dch-whql.exe"
$nvidiaSavePath = "C:\Windows\Computle"
$nvidiaInstallerPath = "$nvidiaSavePath\nvidia_installer.exe"
$nvidiaExtractPath = "C:\NVIDIA\DisplayDriver\552.86\Win11_Win10-DCH_64\International"
$nvidiaLogFilePath = "$nvidiaSavePath\nvidia_install_log.txt"

if (-not (Test-Path -Path $nvidiaSavePath)) {
    New-Item -ItemType Directory -Path $nvidiaSavePath -Force
}

$webClient = New-Object System.Net.WebClient

try {
    $webClient.DownloadFile($nvidiaFileUrl, $nvidiaInstallerPath)
} catch {
    Write-Error "An error occurred during file download: $_"
} finally {
    $webClient.Dispose()
}

Write-Output "NVIDIA installer downloaded to $nvidiaInstallerPath" | Out-File -FilePath $nvidiaLogFilePath -Append

Start-Process -FilePath $nvidiaInstallerPath -ArgumentList "-s", "-noreboot", "-noeula" -Wait -NoNewWindow | Out-Null

if (Test-Path -Path $nvidiaExtractPath) {
    Write-Output "NVIDIA installer extracted to $nvidiaExtractPath" | Out-File -FilePath $nvidiaLogFilePath -Append
} else {
    Write-Error "NVIDIA installer extraction failed."
}

$extractedFiles = Get-ChildItem -Path $nvidiaExtractPath -Recurse
$extractedFiles | ForEach-Object { Write-Output $_.FullName } | Out-File -FilePath $nvidiaLogFilePath -Append

$nvidiaSetupExePath = Get-ChildItem -Path $nvidiaExtractPath -Filter "setup.exe" -Recurse | Select-Object -First 1 -ExpandProperty FullName

if ($nvidiaSetupExePath) {
    Write-Output "Setup.exe found at $nvidiaSetupExePath" | Out-File -FilePath $nvidiaLogFilePath -Append
} else {
    Write-Error "Setup.exe not found in the extracted folder."
}

if ($nvidiaSetupExePath) {
    Start-Process -FilePath $nvidiaSetupExePath -ArgumentList "/s" -Wait -NoNewWindow | Out-Null
    Write-Output "NVIDIA driver installed successfully." | Out-File -FilePath $nvidiaLogFilePath -Append
} else {
    Write-Error "Setup.exe not found in the extracted folder."
}

```

5. Click Run or F5 to start the process.


# Build Scripts

**This page contains useful build scripts for Computle machines.**

## Remove Shutdown from the Start Menu

```powershell
if((Test-Path -LiteralPath "HKLM:\SOFTWARE\Microsoft\PolicyManager\default\Start\HideShutDown") -ne $true) {  New-Item "HKLM:\SOFTWARE\Microsoft\PolicyManager\default\Start\HideShutDown" -force -ea SilentlyContinue };
New-ItemProperty -LiteralPath 'HKLM:\SOFTWARE\Microsoft\PolicyManager\default\Start\HideShutDown' -Name 'Behavior' -Value 32 -PropertyType DWord -Force -ea SilentlyContinue;
New-ItemProperty -LiteralPath 'HKLM:\SOFTWARE\Microsoft\PolicyManager\default\Start\HideShutDown' -Name 'highrange' -Value 1 -PropertyType DWord -Force -ea SilentlyContinue;
New-ItemProperty -LiteralPath 'HKLM:\SOFTWARE\Microsoft\PolicyManager\default\Start\HideShutDown' -Name 'lowrange' -Value 0 -PropertyType DWord -Force -ea SilentlyContinue;
New-ItemProperty -LiteralPath 'HKLM:\SOFTWARE\Microsoft\PolicyManager\default\Start\HideShutDown' -Name 'mergealgorithm' -Value 1 -PropertyType DWord -Force -ea SilentlyContinue;
New-ItemProperty -LiteralPath 'HKLM:\SOFTWARE\Microsoft\PolicyManager\default\Start\HideShutDown' -Name 'policytype' -Value 4 -PropertyType DWord -Force -ea SilentlyContinue;
New-ItemProperty -LiteralPath 'HKLM:\SOFTWARE\Microsoft\PolicyManager\default\Start\HideShutDown' -Name 'value' -Value 1 -PropertyType DWord -Force -ea SilentlyContinue;
```

## Prevent Computle from Sleeping

```bash
powercfg /change standby-timeout-ac 0
powercfg /change standby-timeout-dc 0
powercfg /change hibernate-timeout-ac 0
powercfg /change hibernate-timeout-dc 0
powercfg /change disk-timeout-ac 0
powercfg /change disk-timeout-dc 0
powercfg /change monitor-timeout-ac 0
powercfg /change monitor-timeout-dc 0
```

***

{% hint style="warning" %}
Do not run this script unless requested. This is only to be used under a planned migration.
{% endhint %}

## Install DCV & Set Authentication Mode to Computle Client

```
# Copyright Computle.com - Computle Reinstall DCV Server

# ============================================
# SECTION 1: Install DCV Server
# ============================================
Write-Host "Downloading DCV Server installer..." -ForegroundColor Yellow

$fileUrl = "https://d1uj6qtbmh3dt5.cloudfront.net/2025.0/Servers/nice-dcv-server-x64-Release-2025.0-20103.msi"
$savePath = "C:\Windows\Computle"
$installLogFile = "$savePath\dcv_install_msi.log"

if (-not (Test-Path -Path $savePath)) {
    New-Item -ItemType Directory -Path $savePath -Force | Out-Null
}

$msiFile = Join-Path -Path $savePath -ChildPath "nice-dcv-server-x64-Release.msi"

try {
    Invoke-WebRequest -Uri $fileUrl -OutFile $msiFile -ErrorAction Stop
    Write-Host "Download complete." -ForegroundColor Green
} catch {
    Write-Host "ERROR: Failed to download MSI file: $_" -ForegroundColor Red
    exit 1
}

if (-not (Test-Path $msiFile)) {
    Write-Host "ERROR: MSI file not found after download" -ForegroundColor Red
    exit 1
}

Write-Host "Installing DCV Server (this may take a few minutes)..." -ForegroundColor Yellow
$installProcess = Start-Process msiexec.exe -ArgumentList "/i `"$msiFile`" ADDLOCAL=ALL /quiet /norestart /l*v `"$installLogFile`"" -Wait -PassThru

if ($installProcess.ExitCode -ne 0) {
    Write-Host "WARNING: MSI install exited with code $($installProcess.ExitCode). Check log at $installLogFile" -ForegroundColor Yellow
} else {
    Write-Host "DCV Server installation complete." -ForegroundColor Green
}

# ============================================
# SECTION 2: Configure Registry Settings
# ============================================
Write-Host "Configuring registry settings..." -ForegroundColor Yellow

$registryPaths = @(
    "Registry::\HKEY_USERS\S-1-5-18\Software\GSettings\com\nicesoftware\dcv\license",
    "Registry::\HKEY_USERS\S-1-5-18\Software\GSettings\com\nicesoftware\dcv\connectivity",
    "Registry::\HKEY_USERS\S-1-5-18\Software\GSettings\com\nicesoftware\dcv\session-management\automatic-console-session",
    "Registry::\HKEY_USERS\S-1-5-18\Software\GSettings\com\nicesoftware\dcv\security"
)

foreach ($path in $registryPaths) {
    if (!(Test-Path -LiteralPath $path)) {
        New-Item $path -Force -ErrorAction SilentlyContinue | Out-Null
    }
}

New-ItemProperty -LiteralPath 'Registry::\HKEY_USERS\S-1-5-18\Software\GSettings\com\nicesoftware\dcv\connectivity' -Name 'enable-quic-frontend' -Value 0 -PropertyType DWord -Force -ErrorAction SilentlyContinue | Out-Null
New-ItemProperty -LiteralPath 'Registry::\HKEY_USERS\S-1-5-18\Software\GSettings\com\nicesoftware\dcv\session-management\automatic-console-session' -Name 'owner' -Value 'computle' -PropertyType String -Force -ErrorAction SilentlyContinue | Out-Null
New-ItemProperty -LiteralPath 'Registry::\HKEY_USERS\S-1-5-18\Software\GSettings\com\nicesoftware\dcv\connectivity' -Name 'idle-timeout' -Value 0 -PropertyType DWord -Force -ErrorAction SilentlyContinue | Out-Null
New-ItemProperty -Path "HKLM:\Software\GSettings\com\nicesoftware\dcv\security" -Name "os-auto-lock" -PropertyType DWord -Value 1 -Force -ErrorAction SilentlyContinue | Out-Null

Write-Host "Registry settings configured." -ForegroundColor Green

# ============================================
# SECTION 3: Resolve License Servers and Update Registry
# ============================================
Write-Host "Configuring license servers..." -ForegroundColor Yellow

$licensingServers = @(
    'dcvlicensing1.computle.net',
    'dcvlicensing2.computle.net'
)

$resolvedIPs = @()

foreach ($server in $licensingServers) {
    try {
        $ipAddresses = [System.Net.Dns]::GetHostAddresses($server)
        foreach ($ip in $ipAddresses) {
            $resolvedIPs += "5053@$($ip.IPAddressToString)"
        }
    } catch {
        Write-Host "Failed to resolve $server" -ForegroundColor Red
    }
}

$licenseValue = $resolvedIPs -join ';'
$registryPath = 'Registry::HKEY_USERS\S-1-5-18\Software\GSettings\com\nicesoftware\dcv\license'
New-ItemProperty -LiteralPath $registryPath -Name 'license-file' -Value $licenseValue -PropertyType String -Force -ErrorAction SilentlyContinue | Out-Null

Write-Host "License servers configured: $licenseValue" -ForegroundColor Green

# ============================================
# SECTION 4: Download Certificates
# ============================================
Write-Host "Downloading certificates..." -ForegroundColor Yellow

$sourceKey = "https://certs.computle.net/dcv.key"
$sourcePem = "https://certs.computle.net/dcv.pem"
$destinationFolder = "C:\Windows\System32\config\systemprofile\AppData\Local\NICE\dcv\"

if (-not (Test-Path -Path $destinationFolder)) {
    New-Item -ItemType Directory -Path $destinationFolder -Force | Out-Null
    Write-Host "Created destination folder: $destinationFolder" -ForegroundColor Gray
}

try {
    Invoke-WebRequest -Uri $sourceKey -OutFile "$destinationFolder\dcv.key" -UseBasicParsing -ErrorAction Stop
    Write-Host "Downloaded dcv.key" -ForegroundColor Green
} catch {
    Write-Host "ERROR: Failed to download dcv.key: $_" -ForegroundColor Red
}

try {
    Invoke-WebRequest -Uri $sourcePem -OutFile "$destinationFolder\dcv.pem" -UseBasicParsing -ErrorAction Stop
    Write-Host "Downloaded dcv.pem" -ForegroundColor Green
} catch {
    Write-Host "ERROR: Failed to download dcv.pem: $_" -ForegroundColor Red
}

# ============================================
# SECTION 5: Create Scheduled Task for Daily Certificate Updates
# ============================================
Write-Host "Creating scheduled task for daily certificate updates..." -ForegroundColor Yellow

$scriptBlock = @"
if (-not (Test-Path -Path '$destinationFolder')) {
    New-Item -ItemType Directory -Path '$destinationFolder' -Force
}
try {
    Invoke-WebRequest -Uri '$sourceKey' -OutFile '$destinationFolder\dcv.key' -UseBasicParsing -ErrorAction Stop
} catch {
    Write-EventLog -LogName Application -Source 'DCV Cert Update' -EventId 1001 -EntryType Error -Message "Failed to download dcv.key: `$_"
}
try {
    Invoke-WebRequest -Uri '$sourcePem' -OutFile '$destinationFolder\dcv.pem' -UseBasicParsing -ErrorAction Stop
} catch {
    Write-EventLog -LogName Application -Source 'DCV Cert Update' -EventId 1002 -EntryType Error -Message "Failed to download dcv.pem: `$_"
}
"@

$action = New-ScheduledTaskAction -Execute "PowerShell.exe" -Argument "-NoProfile -ExecutionPolicy Bypass -Command `"$scriptBlock`""
$trigger = New-ScheduledTaskTrigger -Daily -At 3am
$settings = New-ScheduledTaskSettingsSet -AllowStartIfOnBatteries -DontStopIfGoingOnBatteries

try {
    Unregister-ScheduledTask -TaskName "Update DCV Certs" -Confirm:$false -ErrorAction SilentlyContinue
    Register-ScheduledTask -TaskName "Update DCV Certs" -Action $action -Trigger $trigger -Settings $settings -RunLevel Highest -User "SYSTEM" -ErrorAction Stop | Out-Null
    Write-Host "Scheduled task 'Update DCV Certs' created." -ForegroundColor Green
} catch {
    Write-Host "ERROR: Failed to create scheduled task: $_" -ForegroundColor Red
}

# ============================================
# SECTION 6: Configure DCV Permissions
# ============================================
Write-Host "Configuring DCV permissions..." -ForegroundColor Yellow

$permissionsFilePath = "C:\Program Files\NICE\DCV\Server\conf\default.perm"

if (Test-Path $permissionsFilePath) {
    $backupPath = "$permissionsFilePath.backup.$(Get-Date -Format 'yyyyMMdd_HHmmss')"
    try {
        Copy-Item $permissionsFilePath $backupPath -Force
        Write-Host "Permissions backup created: $backupPath" -ForegroundColor Gray
    }
    catch {
        Write-Host "WARNING: Failed to create permissions backup: $_" -ForegroundColor Yellow
    }

    try {
        $content = Get-Content $permissionsFilePath -Raw
        $content = $content -replace '(?m)^; %owner% allow builtin', '%any% allow builtin'
        Set-Content -Path $permissionsFilePath -Value $content -Encoding ASCII -NoNewline
        Write-Host "DCV permissions updated." -ForegroundColor Green
    }
    catch {
        Write-Host "WARNING: Failed to update permissions file: $_" -ForegroundColor Yellow
    }
} else {
    Write-Host "WARNING: DCV permissions file not found at: $permissionsFilePath" -ForegroundColor Yellow
}

# ============================================
# SECTION 7: Port Check and Authentication Configuration
# ============================================
Write-Host "Checking port configuration..." -ForegroundColor Yellow

$securityRegPath = "Registry::HKEY_USERS\S-1-5-18\Software\GSettings\com\nicesoftware\dcv\security"

try {
    $publicIP = (Invoke-RestMethod -Uri "https://api.ipify.org" -ErrorAction Stop).Trim()
} catch {
    Write-Host "WARNING: Could not determine public IP, skipping port check" -ForegroundColor Yellow
    $publicIP = $null
}

$portsOpen = $false

if ($publicIP) {
    for ($port = 8443; $port -le 8473; $port++) {
        try {
            $tcpClient = New-Object System.Net.Sockets.TcpClient
            $connect = $tcpClient.BeginConnect($publicIP, $port, $null, $null)
            $wait = $connect.AsyncWaitHandle.WaitOne(1000, $false)
            
            if ($wait -and $tcpClient.Connected) {
                $portsOpen = $true
                $tcpClient.Close()
                break
            }
            $tcpClient.Close()
        }
        catch {
        }
    }

    if ($portsOpen) {
        Write-Host "ERROR: You have not passed pre-requisites, please consult your account rep." -ForegroundColor Red
        exit 1
    }
}

if (-not (Test-Path $securityRegPath)) {
    New-Item -Path $securityRegPath -Force -ErrorAction SilentlyContinue | Out-Null
}

New-ItemProperty -Path $securityRegPath -Name "authentication" -Value "none" -PropertyType String -Force -ErrorAction SilentlyContinue | Out-Null
New-ItemProperty -Path $securityRegPath -Name "os-auto-lock" -Value 1 -PropertyType DWORD -Force -ErrorAction SilentlyContinue | Out-Null

Write-Host "Authentication configuration complete." -ForegroundColor Green

# ============================================
# SECTION 8: Configure Service and Final Restart
# ============================================
Write-Host "Configuring DCV Server service..." -ForegroundColor Yellow

try {
    Set-Service -Name dcvserver -StartupType "Automatic" -ErrorAction Stop
    sc.exe config dcvserver start= delayed-auto | Out-Null
    Write-Host "DCV Server set to Automatic (Delayed Start)." -ForegroundColor Green
} catch {
    Write-Host "WARNING: Failed to set DCV Server startup type: $_" -ForegroundColor Yellow
}

Write-Host "Restarting DCV Server service..." -ForegroundColor Yellow

try {
    Restart-Service -Name dcvserver -Force -ErrorAction Stop
    Write-Host "DCV Server service restarted." -ForegroundColor Green
} catch {
    Write-Host "WARNING: Failed to restart DCV Server service: $_" -ForegroundColor Yellow
    Write-Host "Please manually restart: Restart-Service dcvserver" -ForegroundColor Yellow
}

# ============================================
# COMPLETE
# ============================================
Clear-Host

Write-Host "========================================" -ForegroundColor Cyan
Write-Host " Computle DCV Server Setup Complete!" -ForegroundColor Green
Write-Host "========================================" -ForegroundColor Cyan
Write-Host ""
Write-Host "Configured:" -ForegroundColor White
Write-Host "  - DCV Server installed" -ForegroundColor Gray
Write-Host "  - License servers configured" -ForegroundColor Gray
Write-Host "  - SSL certificates downloaded" -ForegroundColor Gray
Write-Host "  - Daily certificate update task created" -ForegroundColor Gray
Write-Host "  - Permissions configured" -ForegroundColor Gray
Write-Host "  - Authentication mode set to none" -ForegroundColor Gray
Write-Host "  - Service set to auto-start" -ForegroundColor Gray
Write-Host ""
Write-Host "Ready for connections!" -ForegroundColor Green

```

```
```


# Assignment Agent

{% hint style="danger" %}
This is a BETA release.
{% endhint %}

```
powershell -NoProfile -ExecutionPolicy Bypass -Command "iwr 'https://depres.oncomputle.com/Install-ComputleAgent.ps1' -UseBasicParsing | iex"

```


# Third Party Applications


# Twinmotion crashes when exporting high-resolution renders

{% hint style="info" %}
Created from [EpicGames](https://dev.epicgames.com/documentation/en-us/unreal-engine/how-to-fix-a-gpu-driver-crash-when-using-unreal-engine?application_version=5.0) documentation.
{% endhint %}

### Issue:

* Twinmotion crashes when exporting high-resolution renders.
* Twinmotion's crash log shows "GPU Crash Detected".
* Twinmotion's crash log shows "GPU crash dump triggered".

### Affected versions:

* Twinmotion 2025.1.1 or newer.

<figure><img src="/files/94Nygzy27On4HK2p2k70" alt=""><figcaption></figcaption></figure>

***

### Cause:

Windows contains a Timeout Detection and Recovery protocol which detects response times from the graphics card. The default value is 2 seconds which conflicts with Twinmotion's timeout values, when performing time-consuming, high-resolution exports.

***

### Fix:

**Increase the Windows timeout value to 60 seconds to align to Twinmotion's values.**

{% hint style="danger" %}
Perform these steps as an Administrator.
{% endhint %}

**Steps**

1. Type '**run'** into the Windows operating system search bar. Open the **Run** application.

   ![](/files/nQSWFFeXMOs8P8wTZRSV)
2. In the search field, type '**regedit**'. Click **OK** to open the Registry Edit Tool.

   <figure><img src="/files/6D05tbvDFmlBO7t6u7NS" alt=""><figcaption></figcaption></figure>
3. Navigate to:
4. `Computer\HKEY_LOCAL_MACHINE\SYSTEM\CurrentControlSet\Control\GraphicsDrivers`.

   ![](/files/Bhvg2CrLcF60dIxec8XN)
5. The registry key you need is called `TdrDelay`. If this registry key already exists, double-click to edit it. If it does not already exist, right-click in the pane on the right and select **New > DWORD (32-bit) Value**.

   ![Create a new DWORD registry key](https://d1iv7db44yhgxn.cloudfront.net/documentation/images/4744e353-a524-4113-bf21-45ab186d3f90/new-dword.png)
6. Set the **Base** to **Decimal.** Set the **Value** of TdrDelay to **60**. Click **OK** to finish.

   ![TdrDelay settings](https://d1iv7db44yhgxn.cloudfront.net/documentation/images/d3218114-68f1-48df-b932-182cfe5b9d51/tdr-delay.png)
7. Right-click in the right hand pane and select **New > DWORD (32-bit) Value** and create a 2nd key.
8. Set the **Base** to **Decimal.** Set the **Value** of `TdrDdiDelay` to **60**. Click **OK** to finish.

   ![TdrDdiDelay settings](https://d1iv7db44yhgxn.cloudfront.net/documentation/images/8f89c0ba-d05c-47c4-a671-aa48171ba823/tdr-ddi-delay.png)
9. Your registry should now include both `TdrDelay` and `TdrDdiDelay`.

   <figure><img src="/files/o7ENp5urvr7iDtNulz3q" alt=""><figcaption></figcaption></figure>
10. Close the Registry Editor.
11. Restart your Computle workstation.


# Intune/Entra ID and Computle, BitLocker

This knowledge base article covers common enrollment and device management issues seen when utilising Microsoft services in conjunction with Computle.

***

#### **\[1] You experience irregular MFA prompts or irregular sign-in prompts. \[2] You may experience issues with Windows 11 Enterprise uplifts.** <a href="#id-1-you-experience-irregular-mfa-prompts-or-irregular-sign-in-prompts-2-you-may-experience-issues-w" id="id-1-you-experience-irregular-mfa-prompts-or-irregular-sign-in-prompts-2-you-may-experience-issues-w"></a>

**Synopsis:** Users may experience irregular Microsoft Authenticator requests when using Windows 11 Professional/Enterprise. Messages include "Please sign in to your work or school account to verify your information", "Verify your account" and "We weren't able to connect. Sign in and we'll try again". You may also see issues with device compliance when using Conditional Access policies.

**Windows 11 Enterprise uplift**

* **Cause:** Microsoft Authenticator/3rd party MFA can interfere with the Primary Refresh Token. When Windows is unable to refresh the token, Microsoft removes the Enterprise uplift and can mark the device as non-compliant.
* **Solution:** Per Microsoft [guidelines](https://learn.microsoft.com/en-us/windows/deployment/windows-subscription-activation?pivots=windows-11\&ref=blog.computle.com), you should remove the MFA requirement on the following applications:
  * Universal Store Service APIs and Web Application, AppID 45a330b1-b1ec-4cc1-9161-9f03992aa49f;
  * Windows Store for Business, AppID 45a330b1-b1ec-4cc1-9161-9f03992aa49f;
  * And in our testing, the Microsoft Intune application, AppID 0000000a-0000-0000-c000-000000000000.

**MFA for device enrollment**

* **Cause:** Microsoft Authenticator/3rd party MFA can interfere with the Primary Refresh Token. When Windows is unable to refresh the token, Intune can then mark the device as non-compliant, in turn triggering a sign-out of M365 desktop apps. This may then result in apps failing to sign in.
* **Solution:** Exclude Microsoft Authenticator when enrolling devices into Intune and create a secure, dedicated enrolment account. To do this, head to Entra ID > Devices > Device Settings > and untick MFA on enrolment. Then, create a device enrolment user and configure your enrolment policies to only allow that user.

You should also ensure that Conditional Access policies are updated to match the settings above.

**Third party MFA**

* **Cause:** Default Conditional access policies can interfere with third party MFA.
* **Solution:** Confirm sign-in frequency requirements under Conditional Access > Session > Sign-in frequency.

**Credential cache**

* **Cause:** Cached credentials can cause an immediate failure when trying to re-authenticate with OneDrive/M365 desktop apps.
* **Solution:** Delete the contents of this folder and then re-authenticate.

*C:\Users\\{username}\AppData\Local\Packages\Microsoft.AAD.BrokerPlugin\_cw5n1h*

***

#### **\[1] BitLocker enters a recovery state. \[2] BitLocker re-arms and locks the device.** <a href="#id-1-bitlocker-enters-a-recovery-state-2-bitlocker-re-arms-and-locks-the-device" id="id-1-bitlocker-enters-a-recovery-state-2-bitlocker-re-arms-and-locks-the-device"></a>

**Synopsis:** Computle machine asks for a recovery key on system reboots.

* **Cause:** By default, Windows will lock the BitLocker drive after 4 to 32 incorrect login attempts. BitLocker then resets at a rate of one failure count every two hours. Due to the nature of Computle, where users may share a machine, normal usage behaviour can trigger brute force protection policies. In addition, failed logins from threat actors can also trigger this lockout threshold.
* **Solution:**
  * Configure IP whitelisting/Zero Trust and restrict Computle to dedicated IPs/devices. See our [guide](https://blog.computle.com/zero-trust-and-vdi-how-to-secure-access-with-computle/) for more information.

*Or:*

* Amend the default lockout value under Group Policy > Computer Configuration > Administrative Templates > System > Trusted Platform Module Services > Standard User Individual Lockout Threshold.

*Or:*

* Amend the default lockout value under Intune Device Configurations > Administrative Templates > System > Trusted Platform Module Services.

*Or:*

* Configure [Network Unlock](https://learn.microsoft.com/en-us/windows/security/operating-system-security/data-protection/bitlocker/network-unlock?ref=blog.computle.com).


# Service Delivery Architecture


# Machine Plane

## Dedicated, baremetal hardware

Computle adopts a **Scale-Out Architecture**, where each customer is assigned dedicated resources, ensuring that workloads scale efficiently without compromising performance. To further enhance reliability, Computle follows a **Shared Nothing Architecture**, where each tenant operates independently on dedicated hardware, eliminating the risk of component failures impacting other users.

<div align="left"><figure><img src="/files/szrvZQy11ybWvmZNg7uT" alt="" width="551"><figcaption><p>Computle blade workstation v1</p></figcaption></figure></div>

This is supported by **baremetal hardware** with a **Type 1 hypervisor**, with each hypervisor hosting one virtual machine. Each seat or user has full access to dedicated resources, including CPU, GPU, memory, and NVMe storage, ensuring maximum performance and efficiency. With **both physical and logical tenant isolation**, each hypervisor and its associated resources are dedicated exclusively to a specific tenant, guaranteeing secure and high-performance operations for every customer.

### Features

* **Graphics Card (GPU):** Each user gets exclusive access to a dedicated GPU, allowing for seamless performance in graphics-intensive applications like CAD, 3D rendering, and video editing.
* **CPU:** Every virtual machine has its own dedicated CPU, ensuring consistent performance for compute-heavy tasks. Users won’t experience slowdowns, making this ideal for AEC applications.
* **Memory:** Dedicated memory ensures each VM operates independently with zero contention for resources.
* **NVMe storage:** Users benefit from ultra-fast, dedicated NVMe storage, allowing for rapid access to large files, faster load times, and improved performance for storage-intensive applications.

**Reservations**

Customers should note that due to the virtualisation setup of Computle, parts of the hypervisor are reserved for operational purposes. Specifically:

* **Memory Consumption:** The hypervisor consumes 2-4GB of the host memory. Consequently, a machine with 64GB of total RAM will have around 62GB available for customer use.
* **CPU Usage:** Approximately 0.1% of the CPU is utilised by the hypervisor to manage the virtual machine.
* **Graphics:** Graphics performance remains unaffected by the hypervisor, as GPUs are passed directly to the virtual machine.

**NICE DCV**

NICE DCV is a high-performance remote display protocol developed to provide users with an efficient and seamless experience when accessing virtual desktops and applications. At Computle, we leverage NICE DCV to enhance our Computle Machines, ensuring that our clients benefit from low-latency, high-resolution streaming capabilities. This technology is crucial for supporting graphically intensive applications and workflows, offering a near-native experience regardless of the user's location.

***

## Image management

Computle leverages **QCOW2 imaging** to provide IT administrators with powerful, flexible, and efficient tools for deploying and managing virtual environments. The platform is designed to streamline the provisioning of high-performance workstations, allowing admins to rapidly deploy, clone, and reimage machines as needed, all through our intuitive GUI interface. This enables organizations to scale and manage workstations without complex setup processes, ensuring rapid deployment and maximum performance for every user.

* **Image capture:** Administrators can clone existing Computle Machines to rapidly scale the deployment of identical workstations. This capability is particularly useful when deploying workstations for teams that require the same configuration for tasks like software development, CAD design, or video rendering. Cloning ensures consistency across environments, reducing errors and configuration drift while maintaining performance standards.
* **Image hosting:** Image hosting is provided free of charge. Where required, we can also host Windows Deployment Services.
* **Rapid deployment:** With Computle, admins can quickly deploy new virtual workstations using pre-configured QCOW2 images. This eliminates the need for manual setup, as each VM can be provisioned with a few clicks, ensuring new users or projects are up and running in minutes.

***

## Default build

Computle provides a default build for all customers which can be deployed at any point. This image can be modified using your own applications.

#### Applications

| Windows 11 Professional 24H2 |
| ---------------------------- |
| NICE DCV Streaming Agent     |
| Computle Agent               |
| QEMU Guest Agent             |
| NVIDIA Professional Drivers  |

#### Policy Options

| Administrator account is active.                                                                 |
| ------------------------------------------------------------------------------------------------ |
| Remote Desktop is enabled.                                                                       |
| Access is permitted for any authorized user to connect, with a session limit of one active user. |
| Windows will download updates once the machine is built.                                         |

### Qemu-guest-agent

The QEMU Guest Agent is a daemon that runs inside Computle Machine and allows the hypervisor to execute commands and perform operations within the machine.

{% hint style="info" %}
We advise that you do not remove the QEMU Guest Agent. Doing so will cause a loss of reporting capabilities, the inability to perform graceful power actions, and limited administrator-level recovery options.
{% endhint %}

#### **Data collection**

The QEMU Guest Agent collects a variety of data from Computle machine to assist in management and monitoring. This includes:

1. **System Information:** Hostname and O/S details.
2. **Memory Usage:** Total, free, and used memory.
3. **CPU Information:** Number of CPUs and their usage.
4. **Disk Information:** Disk partitions and file system usage.
5. **GPU Information:** GPU activity data (not currently visible).
6. **Network Information:** Network interfaces and traffic statistics.
7. **Running Processes:** List of active processes with resource usage.
8. **Filesystem Status:** Health and consistency of file systems.
9. **Resource Configuration:** Details on resource allocation and virtual devices.

All data collected is kept within the tenant's namespace and is only visible to trusted users and administrators.

##


# Telemetry and Monitoring at Computle

At Computle, we maintain continuous **24/7 telemetry** across our entire infrastructure and Computle Machines, ensuring that every aspect of performance, security, and uptime is closely monitored. Our system tracks anomalies, machine issues, outages, and performance trends to keep operations running smoothly.

## **Real-Time Monitoring**

**System Information Monitored:**

* **Memory Usage**: Total, free, and used memory, helping identify potential memory bottlenecks.
* **CPU**: CPUs and their usage to monitor performance under load.
* **Disk**: Disk partitions, usage statistics, and file system health to detect potential storage issues.
* **GPU Information**: Active monitoring of GPU utilisation, thermal performance, power draw, and memory usage.
* **Network**: Interface details, traffic statistics, and potential anomalies like high latency or packet loss.
* **Disk Status**: Continuous health checks.

This allows us to quickly identify and resolve potential issues before they affect performance.

***

## **Anomaly Detection**

Our telemetry system uses advanced algorithms to detect anomalies across the estate, such as:

* **Unusual spikes in resource usage** (CPU, memory, disk).
* **Sudden drops in network throughput**.
* **Hardware failures**, such as disk read/write errors or network interface degradation.

When an anomaly is detected, alerts are immediately generated for our engineering team to assess and resolve the issue. We monitor overall **machine health** by looking at historical data trends, identifying patterns of performance degradation, and ensuring proactive maintenance.

***

## **Global Endpoint Monitoring**

We monitor the **global network infrastructure**, including switches, routers, and other critical endpoints, ensuring high availability across regions. This includes tracking uptime, bandwidth usage, and hardware status at each site. If any hardware, such as switches or network interfaces, shows signs of failure, immediate action is taken to prevent service disruptions.

***

## **Outage Detection and Response**

We continuously monitor for machine outages or downtime. If a machine goes offline or experiences reduced availability, our system detects this automatically and begins the remediation process. Failover mechanisms are also in place to ensure high availability across all virtual machines.

Automated responses and notifications are sent to the relevant engineers and customers in case of significant performance or hardware issues. Through this proactive approach, we ensure that the Computle environment runs smoothly 24/7, delivering optimal performance for customers.


# Computle Gateway

**Computle Gateway** is our free network access solution, offering secure, low-latency, and high-performance encrypted connections for both SMEs and Enterprises. Built for **High Availability (HA)**, Computle Gateway ensures that users can always access their resources reliably.

{% hint style="info" %}
If you are an administrator looking to onboard a user into Computle Gateway for SMEs, head [here](/onboarding/administrator-guide/computle-gateway-for-smes).
{% endhint %}

**Low Latency and Always-On Connection**

With WireGuard’s lightweight and efficient architecture, Computle Gateway provides **low-latency, always-on** connectivity. The VPN is designed to minimize overhead, ensuring fast and uninterrupted access to remote resources while keeping security at the forefront.

**End-to-End Encryption**

Computle Gateway uses **end-to-end encryption**, securing all data from the client’s device through the VPN tunnel to their virtual machines (VMs) within the Computle infrastructure. Whether it's SME users connecting through the free service or enterprise customers leveraging SSO and MFA, all communication is encrypted to maintain data confidentiality.

***

## **Versions of Computle Gateway**

**Computle Gateway for SMEs**:

* **Free** version with self-service VPN management.
* Provides secure access to company resources without requiring additional infrastructure.

**Computle Gateway for Enterprise**:

* **£5 per user/month** with added **Single Sign-On (SSO)** and **Multi-Factor Authentication (MFA)**.
* Enterprise-grade security features for larger businesses needing tighter access control and enhanced management capabilities.

Both versions include a **self-service panel** where users can manage VPN connections, troubleshoot access issues, and add or remove devices as needed.

***

## **Network Isolation**

Each tenant within Computle is provided with two virtual network environments (VLANs), ensuring complete data isolation and secure access:

* **Gateway VLAN (DMZ)**: When users connect via Computle Gateway, they are placed in this VLAN, which only provides access to the **DMZ** layer. This allows users to reach their **virtual machines’ login screens**, but they cannot directly access internal resources.
* **Namespace VLAN**: Each virtual machine (VM) is equipped with a separate NIC dedicated to this **namespace-specific VLAN**. This is where the user’s data and applications reside. Once logged in, users can interact with all resources assigned to their VM, but all access is strictly isolated within their namespace.

***

## **Computle Gateway for Enterprise**

The **Enterprise version** of Computle Gateway offers advanced security through **OpenID Connect (OIDC)**, enabling seamless **Single Sign-On (SSO)** and **Multi-Factor Authentication (MFA)**. This integration supports both **Entra ID (formerly Azure AD)** and **on-premises Active Directory**, allowing businesses to leverage their existing identity management systems for secure access.

### Integration: **Azure AD (Entra ID)**

1. **Register the Application in Azure AD:**
   * Go to the **Azure Active Directory** portal.
   * Select **App Registrations** and click **New Registration**.
   * Set the **Name** and **Redirect URI** (use your Computle Gateway callback URL, e.g., `https://gateway.computle.com/callback`).
   * Click **Register**.
2. **Configure API Permissions:**
   * Open the newly registered app.
   * Under **API Permissions**, click **Add a permission**.
   * Select **Microsoft Graph**, then add permissions for **openid**, **profile**, and **email**.
3. **Create a Client Secret:**
   * Under **Certificates & Secrets**, click **New Client Secret**.
   * Set an expiration and copy the secret value (you’ll need this for Computle Gateway configuration).
4. **Set Redirect URIs:**
   * Go to **Authentication** and ensure the redirect URI is set (e.g., `https://gateway.computle.com/callback`).
   * Set **Implicit Grant** to include **ID tokens**.
5. **Get the Client ID and Tenant ID:**
   * Go to **Overview** of the registered application.
   * Copy the **Application (Client) ID** and **Directory (Tenant) ID**.
6. **Configure OIDC in Computle Gateway:**
   * In Computle Gateway’s configuration, add the following:
     * **Client ID**: The Azure AD Application ID.
     * **Client Secret**: The client secret created in step 3.
     * **Issuer URL**: `https://login.microsoftonline.com/{Tenant-ID}/v2.0`.
     * **Redirect URI**: `https://gateway.computle.com/callback`.
7. **Test the Integration:**
   * Access Computle Gateway and authenticate using your Azure AD credentials.

***

### **Integration: On-Premises AD via ADFS**

1. **Install and Configure ADFS:**
   * Install and configure ADFS on your on-premises server.
   * Ensure ADFS is integrated with your Active Directory.
2. **Create a Relying Party Trust in ADFS:**
   * Open ADFS Management.
   * Navigate to **Relying Party Trusts**, click **Add Relying Party Trust**.
   * Choose the option to manually configure the relying party.
   * Enter the **Computle Gateway Callback URL** (e.g., `https://gateway.computle.com/callback`).
   * Complete the wizard.
3. **Configure OpenID Connect (OIDC) in ADFS:**
   * Navigate to **Access Control Policies** in ADFS.
   * Configure the policy to allow OIDC and set the scopes for **openid**, **profile**, and **email**.
4. **Get the Client ID and Secret:**
   * From ADFS, generate a **Client ID** and **Client Secret** for the application.
5. **Configure OIDC in Computle Gateway:**
   * In Computle Gateway’s configuration, add:
     * **Client ID**: The ADFS-generated Client ID.
     * **Client Secret**: The ADFS-generated secret.
     * **Issuer URL**: ADFS URL (e.g., `https://your-adfs-server/adfs/.well-known/openid-configuration`).
     * **Redirect URI**: `https://gateway.computle.com/callback`.
6. **Test the Integration:**
   * Access Computle Gateway and authenticate using your on-premises AD credentials.


# Network Plane

## Core networking

At each of our global locations, Computle leverages a spine-leaf architecture to ensure high-performance networking for tenant workloads. Each machine provisioned within a tenant namespace is assigned its own dedicated 1Gbps interface, ensuring bandwidth consistency and high availability for each user. These dedicated connections extend into the aggregation layer, which is built on 40Gbps and 100Gbps interfaces, allowing for seamless scaling and optimal throughput. The aggregation layer is backed by multiple uplinks to our global carriers, ensuring redundancy, low-latency connections, and high reliability for all tenant traffic.

***

## **Global subnet ranges**

Every Computle Machine is provisioned within a tenant-specific namespace, ensuring strict physical and logical isolation between customers. The provisioning process assigns each machine a private IP address, which is mapped to the tenant's unique identifier (tenantID) and region. This private IP address is part of our Carrier-Grade Network Address Translation (CGNAT) system, operating within the 100.X.X.X/10 range. This structure ensures that Computle Machines and Computle Gateway devices remain isolated from public networks, while seamlessly integrating with the customer's existing infrastructure without causing routing conflicts.

| Site  | Compute Machines | Gateway Devices |
| ----- | ---------------- | --------------- |
| UK-A  | 100.64.0.0/19    | 100.64.32.0/19  |
| UK-B  | 100.65.0.0/19    | 100.65.32.0/19  |
| NY-A  | 100.66.0.0/19    | 100.66.32.0/19  |
| NY-B  | 100.67.0.0/19    | 100.67.32.0/19  |
| LA-A  | 100.68.0.0/19    | 100.68.32.0/19  |
| LA-B  | 100.69.0.0/19    | 100.69.32.0/19  |
| HK-A  | 100.74.0.0/19    | 100.74.32.0/19  |
| HK-B  | 100.75.0.0/19    | 100.75.32.0/19  |
| SYD-A | 100.76.0.0/19    | 100.76.32.0/19  |
| SYD-B | 100.77.0.0/19    | 100.77.32.0/19  |
| PL-A  | 100.78.0.0/19    | 100.78.32.0/19  |
| PL-B  | 100.79.0.0/19    | 100.79.32.0/19  |
| DXB-A | 100.80.0.0/19    | 100.80.32.0/19  |
| DXB-B | 100.81.0.0/19    | 100.81.32.0/19  |
| SGP-A | 100.82.0.0/19    | 100.82.32.0/19  |
| SGP-B | 100.83.0.0/19    | 100.83.32.0/19  |

***

## **Namespace routing**

Routing within tenant namespaces is tightly controlled. Each tenant operates in a dedicated, isolated network environment, and all routing decisions are made at the namespace level. Traffic between tenant machines and external endpoints is routed through Computle Gateway, providing secure and scalable access for users. Our network topology is designed to ensure minimal latency, with spine-leaf routing architectures optimized for both intra-tenant communication and access to external resources. By utilizing this scalable routing structure, we maintain secure, tenant-specific network boundaries while offering flexible connectivity options for customer environments.

***

## **Security framework**

We employ a comprehensive security framework that blocks all inbound access by default, ensuring that tenant machines are never directly exposed to the internet or external threats. Access to tenant resources is only available through the Computle Gateway, our per-tenant VPN service. The Gateway provides secure VPN access, ensuring that only authenticated users can connect to their assigned machines. All traffic passing through the Gateway is subject to access control policies at both the network and application layers.

For customers requiring additional control over their network security, there is an option to deploy custom firewall appliances in front of Computle Machines. Customers can configure their firewall appliances to manage intrusion detection, traffic inspection, and logging policies, providing an extra layer of control in addition to Computle’s default security protections. This service is provided as an optional add-on with supported firewall images including Hyper-V and Linux KVM.

***

## **Public endpoint**

While tenants are assigned public IP addresses for each region, these IPs are dynamic and can change without notice. Starting in 2024, we are deprecating direct public access to tenant-level resources. Going forward, all access will be funneled through Computle Gateway or another secure network access solution, such as a VPN or Zero Trust platform. The Computle Gateway is part of our Tenant Defaults offering and is enabled by default for all new deployments, with phased rollouts planned for existing users. Accessing resources through the Gateway is as simple as connecting to the endpoint format: `gatewayID.region.tenantID.prd.computle.net`. Customers who wish to use custom CNAME records may do so, although these are purely administrative and do not affect the underlying access.

***

## Carriers

Our global carriers provide the backbone for all tenant communication, ensuring low-latency, high-bandwidth connections. This carrier diversity ensures both reliability and high-performance connectivity, with automatic failover mechanisms to mitigate any potential downtime. These include:

* Lumen Technologies
* NTT Communications
* Telia Carrier
* Tata Communications
* Arelion
* Cogent Communications
* GTT Communications
* PCCW
* Telstra
* Zayo Group

***

## Mesh network

Customers utilising distributed storage solutions like *Panzura* can leverage Computle’s free **mesh network** infrastructure, which connects multiple sites through a robust, high-performance network. This mesh topology, depicted in the diagram, seamlessly interconnects different locations (such as **UK-A**, **UK-B**, and **SYD-A**) using dedicated **Tenant Routers** and **Public Endpoints**. The green dashed lines in the diagram represent the connections forming the mesh between different regions and data centers.

**Components:**

* **Tenant Routers**: These routers handle traffic specific to a tenant, providing dedicated, secure paths for tenant data within the Computle infrastructure. They ensure high availability and low-latency routing between customer sites.
* **Public Endpoints**: These act as access points for external connectivity, allowing secure connections between on-premises systems (such as those in customer offices) and the distributed storage solutions. Each site is equipped with redundant **Public Endpoint A** and **Public Endpoint B** connections for failover and redundancy.
* **CPE (Customer Premises Equipment)**: This links the customer's on-prem systems to the mesh network, enabling direct access to the tenant routers and public endpoints.
* **Computle Broker**: The broker facilitates and manages network traffic between the customer’s systems and the tenant’s environment, ensuring traffic is routed optimally between locations.

<figure><img src="/files/ad76okWsq6THxPFxKPoi" alt=""><figcaption><p>Computle Mesh Network Example</p></figcaption></figure>

***

### Site-to-Site VPN support

Computle supports multiple site-to-site VPN options for secure connectivity between customer locations and tenant namespaces:

**IPsec-based solutions**:

* VyOS
* pfSense

**Physical appliances**:

* **Meraki**: Physical Meraki security appliances
* Other hardware products.

#### Remote endpoint requirements

To establish successful VPN connectivity with Computle environments, remote endpoints must support:

* **IKE versions**: IKEv1 or IKEv2
* **Encryption**: AES-128/256-CBC, AES-128/256-GCM
* **Integrity**: SHA1, SHA256, SHA384, SHA512
* **DH groups**: 2, 5, 14-21

#### Pricing

We do not charge for Site-to-Site VPNs.

#### Performance

VPN appliances are provisioned with 1Gbps dedicated interfaces and operate within tenant namespace isolation boundaries.


# IDAM Providers

At Computle, we offer flexible Identity and Access Management (IDAM) solutions to meet the needs of various organizations, allowing you to choose the identity provider that best fits your infrastructure. Below, we outline the three main methods you can use to authenticate users on the Computle platform, detailing the benefits and considerations of each option.

## **Entra ID (Azure Active Directory) – Suggested Route**

Entra ID (formerly Azure Active Directory) is our **recommended** method for managing identity on the Computle platform. It provides a cloud-native identity solution that integrates seamlessly with our infrastructure, offering users a streamlined and secure way to access Computle resources.

**Benefits**:

* **Seamless Integration**: Entra ID is fully compatible with the Computle platform, enabling secure Single Sign-On (SSO) across all your devices, including workstations, web applications, and cloud resources.
* **Scalability**: As your organization grows, Entra ID can scale effortlessly without requiring additional on-premises infrastructure.
* **No On-Prem Infrastructure Needed**: Since Entra ID is cloud-based, there's no need for maintaining on-premises servers for authentication or managing local domain controllers.

**How It Works**

Users authenticate against Entra ID and gain access to Computle resources using their existing corporate credentials. This method ensures a consistent experience across devices, whether accessing from on-site or remotely.

***

## **On-Premises Domain Controllers (Active Directory)**

For organizations that prefer or require an on-premises setup, Computle fully supports integrating with **on-premises Domain Controllers (DCs)**. We offer a unique solution where we can host Domain Controllers and associated infrastructure **for free** in our data centers, enabling you to manage Active Directory services as part of your Computle deployment.

**Benefits**:

* **Familiar Environment**: If your organization already uses Windows Active Directory for user management, this option allows you to maintain existing workflows and infrastructure.
* **Site Hosting**: Computle provides free hosting for your domain controllers, ensuring that you have dedicated resources for authentication without the overhead of physical server maintenance.
* **Hybrid Integration**: On-prem AD can work in conjunction with cloud resources, giving you the flexibility to run hybrid environments.

**Considerations**:

* **Client Access Licenses (CALs)**: While Computle offers Windows 11 Professional licenses as part of our platform, **CALs are not included** if you opt for on-premises Domain Controllers. You will need to obtain and manage your own CALs for any services requiring licensing (e.g., Windows Server access).
* **Management Overhead**: Running on-premises AD requires that you maintain your own DCs and ensure they are kept up-to-date and secure.

**How It Works**

Computle can host your Active Directory Domain Controllers on our infrastructure, ensuring high availability and redundancy. Users authenticate against these local DCs and gain access to Computle services using their existing AD credentials.

***

## **Local User Accounts (Not Suggested)**

While Computle supports the use of **local user accounts** for authentication, we do not recommend this option for most organizations due to security and scalability concerns.

**Benefits**:

* **No External Infrastructure**: Local accounts do not require any external identity provider or Active Directory service, allowing you to create user accounts directly on individual machines.
* **Basic Setup**: For small-scale deployments or temporary setups, local accounts can be a quick solution.

**Considerations**:

* **Limited Security**: Local accounts lack the advanced security features provided by Entra ID or on-premises AD, such as centralized policy management, MFA, or Conditional Access.
* **Scalability Issues**: Managing local accounts becomes cumbersome as your user base grows, and there is no centralized user management or directory to streamline operations.

**How It Works**

Each machine on the Computle platform will have local user accounts configured. Users will authenticate using those credentials, but they won't have access to advanced identity management features like those offered by Entra ID or on-prem AD.


# Storage Providers

Computle offers a flexible array of storage providers to meet the needs of organizations with varying infrastructure requirements. Whether you're looking for a fully managed file share service or need to deploy third-party storage solutions, Computle provides a robust and scalable platform. Below is an overview of the storage options available, including our in-house solution and various third-party integrations.

***

## **Computle Files (Managed File Share)**

**Computle Files** is our fully managed, high-availability file share system designed to provide organizations with a reliable and scalable storage solution. Computle Files is hosted across at least three different storage clusters within the same site, ensuring data availability even in the event of hardware failure. This system is ideal for businesses that need centralised file storage with the added assurance of redundancy and fault tolerance.

{% hint style="info" %}
This service is best suited towards clients with a single location.
{% endhint %}

**Key Features**:

* **High Availability**: Files are replicated across at least three distinct storage clusters, providing seamless access even in the event of a failure.
* **Performance**: Optimized for speed and efficiency, offering low-latency access to files from any connected device.
* **Scalability**: As your storage needs grow, Computle Files can scale effortlessly, allowing you to add capacity without disruption.

**Use Case**

Organizations that require a fully managed, reliable, and high-performing file system with minimal management overhead will benefit from using Computle Files.

***

## **Third-Party Storage Solutions**

In addition to Computle Files, we support the integration of various third-party storage solutions, allowing you to use your preferred storage provider or system while benefiting from Computle’s robust network and compute infrastructure.

### **1. Panzura**

**Panzura** offers a cloud-based distributed file system, ideal for organizations that need to centralize their unstructured data and make it accessible from multiple locations. Computle can host and deploy Panzura’s virtual storage solutions, offering a seamless integration with our platform.

{% hint style="info" %}
This service is best suited towards clients with multiple locations.
{% endhint %}

**Key Features**:

* **Global File System**: Panzura’s Global File System provides a single, unified namespace, allowing users across multiple locations to access the same data with real-time consistency.
* **Data Centralization**: Panzura’s file locking and synchronization mechanisms ensure that data is always available, no matter where it is accessed.

**Prerequisites**:

* **Local Domain Controller Required**: You will need to have a local domain controller hosted within Computle to support DFS functionalities.

### **2. LucidLink**

**LucidLink** offers a cloud-native file system designed for remote access to large files, such as media files or CAD projects. LucidLink operates using object storage backends and provides efficient data streaming for teams that need to collaborate remotely.

{% hint style="info" %}
This service is best suited towards clients with multiple locations.
{% endhint %}

**Key Features**:

* **File Streaming**: Instead of downloading entire files, LucidLink streams file data as needed, optimizing performance and reducing local storage requirements.
* **Collaborative**: Multiple users can access, share, and work on large files from anywhere in the world without transferring large datasets between locations.

### **3. Microsoft OneDrive**

{% hint style="info" %}
This service is not recommended for shared data, such as drawing files.
{% endhint %}

**OneDrive** is Microsoft’s cloud-based storage solution, which integrates seamlessly with the Microsoft ecosystem and can be used as a storage option within the Computle environment.

**Key Features**:

* **File Syncing**: OneDrive allows users to sync files across multiple devices, providing a consistent experience across platforms.
* **Office 365 Integration**: Fully integrates with the Microsoft 365 suite, making it easy to share and collaborate on documents using Office apps.

***

## Pricing

With Computle, you only pay for the deployed storage. There are no extra charges associated with the running of storage appliances such as Panzura.

| Storage tier                  | All-location pricing  |
| ----------------------------- | --------------------- |
| Archive (HDDs)                | £10 per TB/per month  |
| Standard (NVMes)              | £100 per TB/per month |
| Archive (HDDs) (Cross-Site)   | £15 per TB/per month  |
| Standard (NVMes) (Cross-Site) | £150 per TB/per month |


# Computle Tunnel

### Overview

Computle Tunnel is a WireGuard-based site-to-site tunnel service that provides secure, encrypted connections between customer environments and Computle infrastructure. Leveraging the high-performance WireGuard protocol, Computle Tunnel offers a software-defined approach to secure networking, eliminating the need for traditional hardware VPNs or complex firewall configurations.

<figure><img src="/files/NzUNI6I1fDgDgP7SM1db" alt=""><figcaption></figcaption></figure>

<figure><img src="/files/67W1WNbfZqSnexVxDXQz" alt=""><figcaption></figcaption></figure>

### Key Features

* **Software-defined networking**: Pure software implementation with no hardware dependencies
* **Outbound connection model**: No inbound port forwarding required
* **End-to-end encryption**: WireGuard protocol ensures all traffic is encrypted
* **Per-tenant isolation**: Dedicated tunnel instances for each customer
* **Dual operational modes**: Relay server or direct site-to-site connections

### Operational Modes

#### Relay Server Mode

In Relay Server mode, Computle provisions a dedicated relay server within your tenant namespace on Computle's infrastructure. This server acts as a central connection point for all your sites, enabling:

* Centralised traffic management within your Computle environment
* Simplified routing between multiple customer sites
* Consistent performance through Computle's high-bandwidth backbone
* Integration with tenant-specific security policies

Each relay server operates within your assigned IP range (see global subnet table) and is accessible only through authenticated tunnel connections.

#### Direct Site-to-Site Mode

In Direct Site-to-Site mode, your on-premises equipment establishes an outbound connection to Computle's infrastructure, which then facilitates a direct peer-to-peer connection between sites:

1. Customer site initiates an outbound connection to Computle's coordination service
2. Computle authenticates the connection using tenant-specific credentials
3. The coordination service facilitates NAT traversal between sites
4. A direct encrypted tunnel is established between locations

This approach provides optimal performance by routing traffic directly between sites after the initial connection setup.

### Security Framework

Computle Tunnel incorporates multiple security layers:

* **WireGuard protocol**: Modern cryptography with perfect forward secrecy
* **Outbound-only connections**: No inbound ports required on customer firewalls
* **Tenant isolation**: Each tunnel service operates within tenant-specific namespaces
* **Authentication**: Pre-shared keys and certificates tied to tenant ID
* **Traffic encryption**: All data in transit is encrypted using industry-standard protocols

### Network Architecture Integration

Computle Tunnel seamlessly integrates with our architecture, connecting directly to tenant routers within our global infrastructure. This integration allows Tunnel traffic to benefit from the same high-performance networking that supports all Computle services:

* Direct access to 40Gbps and 100Gbps aggregation layers
* Low-latency routing through our global carrier network
* Dedicated bandwidth allocations within tenant namespaces
* Automatic failover through redundant network paths

### IP Addressing and Routing

Computle Tunnel uses dedicated address ranges for routing traffic between sites, including:

* 192.0.0.0/24
* 192.0.2.0/24
* 192.88.99.0/24
* 198.18.0.0/15
* 198.51.100.0/24
* 203.0.113.0/24
* 233.252.0.0/24

### Technical Implementation

Computle Tunnel is powered by a robust Windows service application that manages WireGuard VPN tunnels through a REST API interface. This enables seamless integration with the Computle Orchestrator for centralized management. Key components include:

* **Service Management**: Handles tunnel service lifecycle with automatic recovery
* **Tunnel Configuration**: Manages WireGuard configuration with security best practices
* **Status Monitoring**: Real-time monitoring of tunnel state and connectivity
* **Audit Logging**: Comprehensive logging for security and troubleshooting

### Deployment Process

1. Computle provisions tunnel endpoints within your tenant namespace
2. Configuration files are generated for each site you need to connect
3. Software clients are deployed to Windows Server/Windows 11 instances on a per VLAN basis
4. Outbound connections establish the initial tunnel
5. Encrypted routes are automatically configured between sites

{% hint style="info" %}
Each VLAN requires a Windows Server/Windows 11 instance that hosts the Computle Tunnel Service. This then communicates with the Computle infrastructure and routes your local traffic. We suggest 2vCPUs and 4GB RAM as a minimum.
{% endhint %}

No complex firewall configurations or port forwarding rules are required. The software establishes outbound connections using standard HTTPS ports (443), enabling the tunnel to function in environments with restrictive security policies.

### Global Availability

Computle Tunnel is available in all Computle regions, allowing you to establish secure connections between your sites and any Computle location worldwide. The service leverages our global carrier partnerships to ensure optimal routing and low latency.

### Integration with Computle Broker

Computle Tunnel works seamlessly with Computle Broker, enabling:

* Automatic machine assignment across connected sites
* Dynamic routing updates as resources change
* Unified authentication through Broker API keys
* Consistent user experience across locations

The Tunnel service complements Broker's machine assignment capabilities by providing the secure network layer over which Broker communications can travel.

### Security and Resiliency

Like all Computle services, Tunnel implements comprehensive security and high availability:

* **Resilient infrastructure**: Multiple tunnel endpoints per region
* **Automatic failover**: Instant rerouting if a connection is disrupted
* **Encrypted configuration**: All setup parameters are securely transmitted
* **Health monitoring**: Continuous tunnel status verification
* **Caching for reliability**: Local caching of connection parameters

### Availability and Pricing

Contact your Computle account representative to enable Computle Tunnel for your tenant environment. Our team will work with you to design the optimal tunnel configuration for your specific requirements and provide all necessary software and configuration files. This service is provided free of charge to existing customers.


# Computle Broker

The **Computle Broker Agent** helps you manage machine assignments by dynamically updating based on the device's hostname and assigned user. Computle Broker is available free of charge to Computle customers.

{% hint style="warning" %}
Computle Broker requires an existing VPN solution such as [Computle Gateway for SMEs.](/onboarding/administrator-guide/computle-gateway-for-smes)
{% endhint %}

***

## Broker Agent <a href="#broker-agent" id="broker-agent"></a>

Each Computle machine is supplied with our brokering agent. This agent is responsible for dynamic machine assignment based on the device's hostname and the assigned user.

<div align="left"><figure><img src="https://blog.computle.com/content/images/2024/09/Screenshot-2024-09-26-005922.png" alt="" height="232" width="348"><figcaption><p>Broker Agent</p></figcaption></figure></div>

***

## Assignment Manager <a href="#assignment-manager" id="assignment-manager"></a>

Administrators can access a simple interface where they can assign machines. Within here, they can also browse previous versions of the assignments and restore previous versions where required.

<div align="left"><figure><img src="https://blog.computle.com/content/images/2024/09/image-1.png" alt=""><figcaption></figcaption></figure></div>

***

## End User Experience

Connecting to your assigned machine is easy. Simply enter your username, and your assigned machine is automatically presented.

<div align="left"><figure><img src="https://blog.computle.com/content/images/2024/09/image-2-1-1.png" alt="" height="549" width="403"><figcaption><p>Computle Client App</p></figcaption></figure></div>

<div align="left"><figure><img src="https://blog.computle.com/content/images/2024/09/image-3-1-1-1.png" alt="" height="549" width="404"><figcaption></figcaption></figure></div>

***

## **Security and API Key Authentication**

Each tenant is assigned a unique API key, which is used to authenticate access to their machines and data. All communications between the Computle Broker Agent and our servers are encrypted using HTTPS, ensuring that data in transit is secure. API keys ensure that only authorized users can interact with the system.

Tenant data is fully isolated, with each tenant’s information stored in a dedicated, separate environment to prevent cross-access between tenants. This ensures that machine assignments and other sensitive information remain secure and exclusive to each tenant.

***

## Service Resiliency

**High Availability**

Computle's infrastructure is designed with high availability in mind, ensuring that our services remain operational even in the event of hardware failures or network issues. Each component of our system, from storage to compute, is built with redundancy and failover mechanisms to maintain uptime. This architecture helps provide continuous access to machine assignments and ensures that the Computle Broker Agent can perform without interruption.

**Caching for Reliability**

In the event that the app is unable to download the latest assignment file due to a network issue or API unavailability, the app intelligently caches the last known good file. This ensures that users can continue to work with their assigned machines even during temporary disruptions. As soon as connectivity is restored, the app will automatically attempt to download the latest file, maintaining seamless operation without user intervention.\\

***

## Installation Guide

{% hint style="warning" %}
Ensure that you have your API credentials before installing Computle Broker.
{% endhint %}

{% hint style="warning" %}
Computle Broker requires the pre-installation of [NICE DCV](/troubleshooting/component-reinstallation/reinstall-dcv-server).
{% endhint %}

### Computle Client

Computle Client runs on the user's device and provides easy access to your Computle machine.

{% hint style="info" %}
[Computle\_Client\_x64\_2024.09.01.0.exe](https://downloads.oncomputle.com/Computle_Client_x64_2024.09.01.0.exe)
{% endhint %}

**Unattended installation**

`Computle_Client_x64_2024.09.01.0.exe /S /USERNAME=YourUsername /PASSWORD=YourPassword /TENANT=YourTenantUUID /AGREETERMS`

### Computle Agent

Computle Agent runs on the target machine and handles the automatic allocation.

{% hint style="info" %}
[Computle\_Agent\_x64\_2024.09.01.0.exe](https://downloads.oncomputle.com/Computle_Agent_x64_2024.09.01.0.exe)
{% endhint %}

**Unattended installation**

`Computle_Agent_x64_2024.09.01.0.exe /S /USERNAME="YourUsername" /PASSWORD="YourPassword" /TENANT_UUID="YourTenantUUID" /ACCEPT_TERMS`


# Service Operations


# Shared Responsibility Model

When migrating to Computle, it's crucial to understand which responsibilities are handled by Computle and which remain with your internal team or technical support provider. Below, we outline the end-to-end system architecture, from hardware provisioning to end-user support, and clarify the division of responsibilities.

### Division of Responsibility

In traditional computing setups, workstations are physically located in offices or home environments. You or your technical support provider handle hardware procurement, maintenance, upgrades, and disposal. With Computle, these responsibilities are streamlined and shifted to us. We fully manage the provisioning, maintenance, and lifecycle of the workstations in our data centres. However, the workstation service is just one aspect of your overall IT infrastructure.

***

### User and Identity Management

**Computle:**

* Computle can host virtualized domain controllers on Hyper-V. There is no fee for this service.
* Computle can provide virtualized Windows Server X instances which can be provisioned by you or your technical support provider as a Domain Controller. There is no fee for this service.
* Each customer is provided with a self-service portal which allows them to reset the local administrator account on provisioned workstations.

**You or your technical support provider:**

* You or your technical support provider handle all aspects of user management, including account creation, access permissions, password resets, and identity management (Azure AD, Google Workspace, etc.).

***

### Networking

**Computle:**

* Computle manages the network connections within its data centres, ensuring workstations and virtualized infrastructure are connected to the internet.
* Computle provides and operates [Computle Gateway](/onboarding/administrator-guide/computle-gateway-for-smes) VPN services (excluding user provisioning).
* Computle manages upstream providers and peering relationships, floating public IP addresses, IP address assignment, public DNS management, and tenant namespaces.

**You or your technical support provider:**

* You or your technical support provider are responsible for office network infrastructure, internet connections, firewalls, VPNs and user profiles for Computle Gateway, WiFi, routers, and switches.

***

### Cloud Services

**Computle:**

* Computle provides connectivity for workstations to access cloud environments but does not manage the actual cloud services (e.g., Office 365, Google Workspace, Azure, AWS, GCP).

**You or your technical support provider:**

* You or your technical support provider handle cloud service management, including licensing, user access, security configurations, and cloud infrastructure provisioning.

***

### Servers and Storage

**Computle:**

* Computle can host virtualized storage systems, ensuring clients can access their storage and data from a localised environment.
* Computle can host virtualized storage solutions like Panzura.

**You or your technical support provider:**

* You or your technical support provider manage data residency, compliance, file management, data integrity, and other storage or caching solutions.

***

### Applications

**Computle:**

* Computle applies software updates to the underlying hypervisors, networking equipment, routers, and firewalls, and other equipment at regular intervals.
* Computle maintains vulnerability management across our estate.
* Computle does not manage software installation or updates on the Windows instance. However, maintenance windows on the underlying hypervisor may trigger an update process within the Windows instance.

**You or your technical support provider:**

* You or your technical support provider manage the installation, maintenance, and updates of applications (e.g., Office 365, Adobe, custom software) across your infrastructure.

***

### Imaging

**Computle:**

* Computle provides each customer with a self-service portal where they can perform machine-level changes such as the deployment of Windows images and the reimaging of the virtual machine.
* Computle provides free image hosting services as required.
* Computle provides remote access to the virtual machine during the boot cycle to enable the deployment of custom images.
* Computle can host virtualised environments as required, such as Windows Deployment Services shares and hosts. There is no cost for this service.
* Computle can provide DHCP services for solutions such as Windows Deployment Services.
* Computle can provide a managed image deployment service as part of a professional services agreement.

**You or your technical support provider:**

* You or your technical support provider manage the installation, maintenance, and updates of the Windows image to your Computle workstations, outside of any professional services agreement.

***

### Licensing

**Computle:**

* Computle handles Windows 11 Professional licensing for the hosted workstation infrastructure.

**You or your technical support provider:**

* You or your technical support provider manage software licensing and subscriptions for productivity suites, antivirus software, Client Access Licenses, and other necessary tools for your business operations.

***

### Printers

**Computle:**

* Computle does not manage printers.
* Computle can support the implementation of VPN solutions to enable access to network based devices. There is no fee for this service.

**You or your technical support provider:**

* You or your technical support provider are responsible for managing printers, scanners, copiers, and other peripherals, including print servers, drivers, and troubleshooting.

***

### Security

**Computle:**

* Computle ensures the security of the Computle infrastructure as defined [here](#security).
* Computle ensures basic security for hosted workstations, such as firewall rules and optional encryption within its data centres.

**You or your technical support provider:**

* You or your technical support provider handle endpoint protection, network firewalls, VPN setups, email filtering, and compliance with data security regulations.

***

### Data Integrity and Availability

**Computle:**

* Computle ensures stable operation of the virtualized environment and ensures that Computle services meet the defined [SLA](#contracts-and-slas) requirements.
* Computle does not routinely manage backups of client data or disaster recovery solutions unless otherwise agreed.

**You or your technical support provider:**

* You or your technical support provider manage data backup solutions (cloud, on-prem, or hybrid) and implement disaster recovery plans to ensure data recovery, unless otherwise agreed.

***

### Email

**Computle:**

* Computle does not manage email systems.

**You or your technical support provider:**

* You or your technical support provider manage email platforms like Microsoft Exchange, Office 365, Gmail, or other email systems, including user provisioning, security, spam filtering, and email backup.

***

### Compliance

**Computle:**

* Computle ensures hosted workstations and virtualized resources comply with ISO27001 security standards at a compute-level and data-centre level.

**You or your technical support provider:**

* You or your technical support provider are responsible for ensuring compliance with industry regulations (e.g., GDPR, HIPAA) across your IT infrastructure, including data storage, encryption, and access controls.

***

### Monitoring

**Computle:**

* Computle monitors the health and performance of hosted workstations and virtualized systems.
* Computle collects telemetric data from Computle applications and from the virtual machines.
* Computle identifies bugs and fixes to operational issues.

**You or your technical support provider:**

* You or your technical support provider manage broader monitoring tools for your entire IT environment, including network performance, cloud service uptime, server health, and security monitoring.

***

### Support

**Computle:**

* Computle ensures workstations in its data centres are functioning properly and provides free support connecting to your Computle workstation. This service is generally provided between 8am and 8pm UK time.
* Computle does not provide end-user support for other matters unless covered under a professional services agreement.

**You or your technical support provider:**

* You or your technical support provider handle day-to-day end-user support, including software issues, password resets and general troubleshooting.

***

### Hardware

**Computle:**

* Computle manages the physical infrastructure in its data centres, including hypervisors, storage infrastructure, networking devices, and other required hardware.
* Computle remotely manages Computle Devices that exist in client locations, such as offices, or homes. For the lifetime of the device, we provide diagnostics and repairs as required.

**You or your technical support provider:**

* You or your technical support provider manage office hardware like printers, network equipment, monitors, and peripherals.

***

### SLAs

**Computle:**

* Computle maintains SLAs covering the availability and uptime of hosted workstations in its data centres.

**You or your technical support provider:**

* You or your technical support provider manage contracts and SLAs with other service providers like internet providers, cloud platforms, and software vendors.

***

### Automation

**Computle:**

* Computle routinely implements automation within the Computle estate but does not manage scripting for broader IT needs.
* Computle provides scripts for the provision and repair of self-service [Computle components](https://github.com/jakeelsleycomputle/ComputleDocs/blob/July2024/service-delivery/service-operations/broken-reference/README.md), such as our streaming applications, for use by you or your technical support provider.

**You or your technical support provider:**

* You or your technical support provider manage automation scripts for system backups, software updates, and network monitoring.

***

### Telephony

**Computle:**

* Computle does not manage telephony systems or VoIP infrastructure.

**You or your technical support provider:**

* You or your technical support provider are responsible for telephony, including managing VoIP services, phone systems, and platform integration like Microsoft Teams or Google Meet.


# Security at Computle

## Security at Computle

At Computle, we ensure that that both physical and digital protections are in place to safeguard critical infrastructure and sensitive data. We implement a multi-layered approach across several domains to provide our customers with confidence in the integrity and privacy of their operations.

***

## Data Centres

Computle places paramount importance on physical security to ensure the safeguarding of sensitive data within its data centers and critical infrastructure. To achieve this, we have implemented stringent measures to control and monitor access to our facilities. Our data centers are equipped with multi-layered security systems, including biometric authentication, access card systems, and video surveillance.

Only authorized personnel with the appropriate credentials are granted entry to restricted areas, and all access events are closely monitored and logged. Furthermore, our server rooms are designed with reinforced access points, environmental controls, and fire suppression systems to mitigate potential physical threats.

***

## Host Isolation

Each physical host in our infrastructure is dedicated exclusively to running a single Computle machine instance for a customer. This approach guarantees that a customer's workload operates in complete isolation, with exclusive access to the underlying hardware resources. By dedicating each host to one client, we eliminate the risk of data co-mingling and resource contention. This strict isolation enhances data security and privacy, minimizing the potential impact of security incidents on neighbouring instances.

***

## Site Isolation

Computle implements stringent network segmentation and access controls to ensure that data and resources within one site remain completely separate from those in other sites. This approach reduces the attack surface and prevents potential lateral movement for cyber attackers.

***

## Tenant Isolation

Although Computle provides shared services to multiple customers, we prioritize ensuring the highest level of security and data isolation. To achieve this, we implement robust tenant isolation measures that block inter-tenant traffic. Each tenant's data and resources are strictly segregated, creating distinct virtual boundaries that prevent any unauthorized access or interaction between tenants. Each host is dedicated to a single tenant, and each host resides in a tenant namespace, with access to those hosts permitted only to devices within that specific namespace.

***

## Zero Trust

Computle operates on the principle of "never trust, always verify," ensuring that no user or device is granted unrestricted access by default. Our ZTA implementation involves rigorous identity verification through multi-factor authentication (MFA) and robust identity and access management (IAM) systems. We enforce the principle of least privilege access, limiting access rights to the minimum required for each user or device. Network micro-segmentation is employed to create isolated segments, reducing the lateral movement potential of threats. Continuous monitoring and policy-based access control help us detect and respond to anomalies in real-time.

***

## Hardware Keys

Computle leverages phishing-resistant FIDO2 keys with WebAuthn as a crucial component of our Multi-Factor Authentication (MFA) strategy. By incorporating these hardware-based security keys into our authentication process, we provide an additional layer of security beyond passwords. When users access our systems or services, they are required to use their FIDO2 key, combined with a password and a trusted device. This hardware-based MFA adds a robust security layer, effectively reducing the risk of phishing attacks.

***

## Security Information and Event Management (SIEM)

Computle's SIEM solution aggregates data from various sources, including network devices, servers, applications, and security tools, to provide a holistic view of our estate. By continuously monitoring this data, we can quickly detect and respond to security events and incidents, such as suspicious network traffic, unauthorized access attempts, or malware outbreaks and provide automatic remediation such as device quarantine.

***

## Security Auditing and Logging

Security auditing and logging are essential components of Computle's security approach, enabling us to detect and respond to security incidents, maintain compliance, and continuously enhance our security posture. These practices are crucial in our commitment to protecting our clients' data and assets from emerging cybersecurity threats.

***

## NICE DCV

NICE DCV employs robust security mechanisms to ensure the security of data in transit between the DCV server and the client.

* **TLS**: NICE DCV uses TLS to encrypt all data transmitted between the server and the client. TLS is a widely adopted security protocol designed to provide privacy and data integrity. It prevents eavesdropping, tampering, and message forgery, ensuring that any data exchanged remains confidential and unaltered.
* **SSL Certificates**: The DCV server requires an SSL certificate to establish secure TLS connections. Computle certificates are issued by a trusted Certificate Authority (CA) for public access. The SSL certificate ensures that the server's identity is authenticated and that the communication channel is secure.
* **End-to-End Encryption**: DCV ensures that all communication, including video, audio, keyboard, and mouse data, is encrypted from the moment it leaves the client until it reaches the Computle Machine. This end-to-end encryption guarantees that no intermediary can access or modify the data.
* **Session Authentication**: Before any data is transmitted, DCV sessions are authenticated using secure methods such as local authentication, EntraID, or Active Directory. This authentication process verifies the identities of the client and server, establishing a trusted connection before any sensitive information is exchanged.


# Maintenance of Computle Infrastructure

At Computle, we regularly patch the underlying hypervisors to ensure performance, security, and reliability. Patching takes place during our **global maintenance window** on **Saturdays**, with **Sunday reserved for rollback** if needed. The process involves placing virtual machines into a **paused or hibernated state**, allowing updates to be applied seamlessly without interrupting workloads.

Patches are applied across **fault domains** and are thoroughly tested to minimize risk. Any sign of failure immediately halts operations. Each site is patched **independently**, and while rare, **Windows instances may reboot** during the maintenance window.

{% hint style="success" %}
Our global maintenance window is on Saturdays. If critical vulnerabilities are detected outside of this window, we will engage with the account leads and schedule an emergency maintenance window.
{% endhint %}

***

## **Global Maintenance Window and Rollback**

Patching takes place during our **global maintenance window**, scheduled for **Saturdays**. If any issues are encountered during the patching process, **Sunday** is reserved for rolling back updates and restoring the environment to its previous state. This two-day window provides ample time to test and correct any potential issues while minimizing the impact on customer workloads.

{% hint style="info" %}
**Notification**

During the maintenance window, we automatically alert the logged-in user. However, if they have disabled notifications,

<img src="/files/ANx5G1NeMX3dC9DibFbr" alt="" data-size="original">
{% endhint %}

***

## **Pausing and Hibernation**

When virtual machines are placed into **paused or hibernated states**, all active processes and sessions are preserved, allowing us to update the underlying hypervisor infrastructure without disrupting workloads. This ensures that the machine resumes smoothly after the update. However, there is a rare chance that **Windows instances may require a reboot** during this process. While this occurrence is infrequent, it is essential for customers to prepare for the possibility of a reboot during the maintenance window.

***

## **Underlying Hypervisor Patching**

The patching process focuses on both the **virtualization technology** and the **host operating system**. Updates target core elements of the hypervisor, including networking, storage, and resource management, ensuring optimal performance and the latest security enhancements. Each update is carefully tested within isolated fault domains to verify that stability and functionality are maintained throughout the process.

***

## **Fault Domain Isolation and Testing**

To limit the impact of patching, we isolate the updates within **fault domains**. This strategy ensures that patches are applied to small sections of the environment at a time, allowing any issues to be identified before a wider rollout. Each fault domain is **rigorously tested** after patching to ensure there are no performance issues. Should any failure occur during testing, the **entire process is halted** until the issue is resolved.

***

## **Site-by-Site Execution**

Patching is executed on a **site-by-site** basis, ensuring that only one location undergoes patching at a time. This approach reduces the risk of disruption across your global operations, as unaffected sites continue running smoothly while maintenance is performed. Each site is updated individually, ensuring that the patching process is localized and isolated.

***

## **DevOps-Driven Automation**

All hypervisor patching is automated through our **DevOps pipeline**, ensuring consistent, efficient deployment of updates. The automation pipeline includes pre-patch validation, post-patch testing, and continuous monitoring for any failures. Should an issue arise, the system automatically pauses the patching process and, if necessary, triggers a rollback to ensure system stability.

Through this carefully controlled maintenance process, Computle ensures that your virtual environments remain secure, stable, and up-to-date with the latest performance and security improvements, while minimizing downtime and operational impact.


# Tenant-Level Configuration


# Network Access


# Tenant Defaults


# Computle Gateway


# End User Guide


# Administration


# Tenant Options


# Custom Gateways


# Traditional VPN


# Zero Trust


# Site-to-Site Connectivity


# Cisco Meraki


# WireGuard


# Supply Chain Management


# Standards


# ISO 27001 Security Controls

Computle is proud to be ISO 27001 certified, demonstrating our commitment to maintaining the highest standards of information security. This certification is a testament to our robust information security management system, designed to safeguard the sensitive data of our clients, partners, and employees.

At Computle, we have implemented a comprehensive ISMS that includes:

1. **Risk Assessment and Treatment**: Regularly identifying potential security risks and implementing appropriate controls to mitigate them.
2. **Security Policies**: Developing and enforcing security policies to guide our employees in maintaining information security.
3. **Incident Management**: Establishing procedures for reporting and handling security incidents promptly and effectively.
4. **Access Control**: Ensuring that only authorized personnel have access to sensitive information.
5. **Continuous Improvement**: Regularly reviewing and updating our security measures to adapt to evolving threats.

Our ISO 27001 certification process involved rigorous internal and external audits, confirming that Computle meets the stringent requirements of the standard. By achieving this certification, we assure our clients that their data is handled with the utmost care and security.


# Vulnerability Disclosure Programme

Our VDP is designed to facilitate a responsible and collaborative approach to cybersecurity, ensuring that any reported vulnerabilities are acknowledged, thoroughly investigated, and addressed in a timely and responsible manner. Your assistance in identifying and reporting potential security risks is invaluable in helping us maintain the integrity and security of our systems and data, and we greatly appreciate your commitment to responsible disclosure.

If you discover a security vulnerability, please contact us directly at **<GetHelp@Computle.com>**. Please note that we will not respond to reports of minor or non-impactful issues that do not pose a meaningful risk to our systems or data. We will also not respond to vulnerability reports that directly relate to a customer's use of Computle or its services.


# Computle Ethos


# Our Approach to Engineering

## Other companies resell someone else's kit. We design our own patentable hardware and pass on savings of up to 80%.

<figure><img src="/files/wH7CpkWMjH0PY5JgsYTz" alt=""><figcaption><p>Computle V1 Blade Workstation</p></figcaption></figure>

***

A typical VDI provider will purchase off-the-shelf servers or workstations, cram a bunch of virtual machines onto them, and place them in a data centre.\
\
Whilst this is fine for some use cases, when you start to scale the service or use more demanding application, the platform's users start to face *significant* barriers and bottlenecks.\\

* You'll experience CPU, GPU and disk contention.
* Your costs will be significantly more than a regular computer or workstation.
* And you will inefficiently utilise data centre space, resulting in poor-cost optimisations and a difficultly adding more nodes efficiently.

**Computle took a different approach from day one.**\\

**‍**At the outset of Computle's foundation, Jake engineered his own hardware, placing an emphasis on dedicated, single-user servers/workstations.\
\
We are now on *revision four* of our hardware, and currently operate Computle from a series of blade workstations, each equipped with:‍

* A dedicated CPU;
* A dedidicated GPU;
* And a dedicated NVMe and RAM modules.

Because of this, each Computle seat delivers unparalleled performance compared to VDIs, with each seat/user having dedicated access to an entire blade workstation.\
\
**What's more, each Computle blade costs around half the price of off-the-shelf hardware, enabling us to pass on significant cost savings to our customers.**


# Carbon Neutrality

## We are dedicated to achieving carbon neutrality by 2035. While on this journey, we have transitioned key sites to 100% renewable energy and are actively working to minimize the carbon footprint of our supply chain.

***

## 100% Renewable Energy

Wherever feasible, we operate on 100% renewable energy. This commitment underscores our efforts to reduce environmental impact and aligns with global sustainability initiatives. By embracing renewable energy, we aim to significantly lower carbon emissions and set industry benchmarks for ESG (Environmental, Social, and Governance) practices within workstation delivery. Additionally, select office locations and mixed-energy sites are transitioning to renewable sources, reflecting our continuous drive towards sustainable operations.

## Use of Biodiesel for Backup Generators

To further reduce our environmental footprint, our facility partners are introducing biodiesel as a sustainable fuel alternative for our backup generators, where possible. Biodiesel offers a renewable solution that significantly lowers emissions compared to traditional diesel, helping us align with our carbon-neutral goals. By integrating biodiesel into our operations, we continue to uphold our commitment to sustainability even in areas reliant on backup power.

## Reduction of Single-Use Materials

At Computle, we engineer and manufacture our blade workstations in-house, giving us complete control over component selection. To enhance recyclability, we prioritize materials such as metals while eliminating unnecessary plastics, like front bezels. As a result, approximately 80% of each workstation is recyclable through conventional programs, with the remaining components—such as printed circuit boards—recycled via specialized facilities.

## Localised Production

Rather than shipping fully assembled workstations to our data centres, we leverage local inventory wherever possible and only transport essential components. This approach reduces shipping weight by approximately 40 kg per rack, significantly lowering our transportation-related carbon footprint.

## Energy Status Across Locations

Our commitment to renewable energy is reflected in the energy sources used across our sites. As part of our transition to full sustainability, several key sites are already powered by 100% renewable energy, while others are currently operating on mixed energy sources as they progress towards full renewable energy integration. The table below provides an overview of the energy status at our global locations:

| **Site** | **Status**                       |
| -------- | -------------------------------- |
| UK-A     | Powered by 100% renewable energy |
| UK-B     | Powered by 100% renewable energy |
| SGP-A    | Powered by 100% renewable energy |
| SGP-B    | Powered by 100% renewable energy |
| NY-A     | Mixed energy sources             |
| NY-B     | Mixed energy sources             |
| LA-A     | Mixed energy sources             |
| LA-B     | Mixed energy sources             |
| HK-A     | Mixed energy sources             |
| HK-B     | Mixed energy sources             |
| SYD-A    | Mixed energy sources             |
| SYD-B    | Mixed energy sources             |
| PL-A     | Mixed energy sources             |
| PL-B     | Mixed energy sources             |
| DXB-A    | Mixed energy sources             |
| DXB-B    | Mixed energy sources             |

As we transition our mixed-energy sites to renewable energy sources, we continue to take meaningful steps towards achieving carbon neutrality by 2035.


# Direct Debit Set Up

To set up a Direct Debit:

1. Navigate to the [Billing Portal](https://checkout.computle.com/p/login/6oEcOtdSkd4v2ha8ww).

<figure><img src="/files/E6qhEQNihmqd9K7ZqgwD" alt=""><figcaption></figcaption></figure>

2. Enter your email and click Send

{% hint style="warning" %}
Only the Billing Owner can log in to this page.
{% endhint %}

<figure><img src="/files/E6qhEQNihmqd9K7ZqgwD" alt=""><figcaption></figcaption></figure>

3. Open your emails.
4. Locate the email from Computle with the subject "*Your Customer Portal Login Link"*

<figure><img src="/files/lNuQ2uuhuqrpGlOjy3ld" alt=""><figcaption></figcaption></figure>

5. Click *Log In To Your Customer Portal*
6. Click *Add Payment Method*

<figure><img src="/files/N85pGsMMnmn24bIKEDYQ" alt=""><figcaption></figcaption></figure>

7. Click *Bacs Direct Debit* and complete the fields.

<figure><img src="/files/or930Ck5i3edsn045jfX" alt=""><figcaption></figcaption></figure>

8. Tick the authorisation field.

<figure><img src="/files/WHl9ma6I32TFDbmXyGrI" alt=""><figcaption></figcaption></figure>

9. Click Add.

{% hint style="info" %}
Within the next 4 weeks, Stripe will contact you to confirm that the Direct Debit Mandate has been established.
{% endhint %}


# Viewing Your Invoices

To set up a Direct Debit:

1. Navigate to the [Billing Portal](https://checkout.computle.com/p/login/6oEcOtdSkd4v2ha8ww).

<figure><img src="/files/pw2A83WLrQ2ewkdT8GsQ" alt=""><figcaption></figcaption></figure>

2. Enter your email and click Send

{% hint style="warning" %}
Only the Billing Owner can log in to this page.
{% endhint %}

<figure><img src="/files/E6qhEQNihmqd9K7ZqgwD" alt=""><figcaption></figcaption></figure>

3. Open your emails.
4. Locate the email from Computle with the subject "*Your Customer Portal Login Link"*

<figure><img src="/files/lNuQ2uuhuqrpGlOjy3ld" alt=""><figcaption></figcaption></figure>

5. Click *Log In To Your Customer Portal*
6. Navigate to Invoice History

<figure><img src="/files/qoh5MpEnr3MZbn2zh2Zy" alt=""><figcaption></figcaption></figure>


# Features Roadmap

View our roadmap [here](https://tracker.computle.com/roadmap).


# Entra ID Sync with On-Premise Active Directory: Validating Seamless File Share Access

**Question**: Can you achieve seamless access to on-premise file shares when using Entra ID Sync and Computle/a third party?

**Answer**: Yes.

***

### **Architecture**

* On premise Active Directory with Entra ID integration.
* On premise file share.

### **Log in flow**

<figure><img src="/files/Ot19bRIoCvjeV4GuaKGg" alt=""><figcaption></figcaption></figure>

<figure><img src="/files/b5V0E7PP0rKHr9MsPxqg" alt=""><figcaption></figcaption></figure>

### **File operations**

No password is requested as Entra ID Sync validates the user's identity.

<figure><img src="/files/cyl9OT1ue3EvGgTqqZ1W" alt=""><figcaption></figcaption></figure>

<figure><img src="/files/k2r9qxzHHzJc0CTYdSir" alt=""><figcaption></figcaption></figure>

### Permission validation

<figure><img src="/files/Nqn1xJiCjJYRolj7iuir" alt=""><figcaption></figcaption></figure>

<figure><img src="/files/vjA9e7omKRhCXaSVWl0U" alt=""><figcaption></figcaption></figure>

### Backend set up

<figure><img src="/files/E6ridpLGZLYDEEuYcdLu" alt=""><figcaption></figcaption></figure>